I grew up wearing home made halloween costumes every year, a tradition that I am continuing with my own kids. I love the excitement of planning them together, but the hardest part is agreeing on what the costumes should be...the kids have accepted (with a little difficulty some years) that we do not buy store bought costumes, but that does not mean that they are that conscious of my costume making limitations! Every year we go through all the possibilities and brainstorm about how we would make the various ideas. I am not sure what this year will bring, but thought it might be fun to share some of the costumes we have made in past years, so will be posting lots of idea over the next month.
Although many of these costumes do require some sewing I want to emphasize that I do not do careful finishing details, or very elaboriate constructions. Many of the finished projects have raw edges that fray or look a bit sloppy, sometimes because I could not figure out how to do a better job, other times just because I am out of time. I like the fact that they are home made in a very obvious way, and I hope that as the kids get older that they will love making their own costumes, or working together with me to make them.

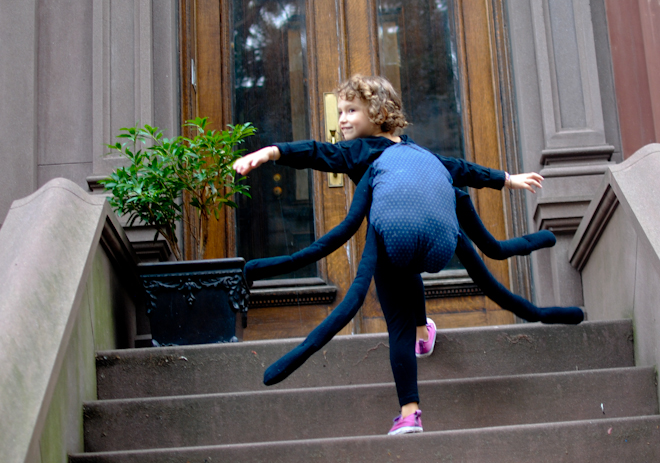
This spider costume was one of the easiest to make, and it was fun to wear too since the spider legs move so well with your child's movements. I first made this spider for Oliver but the photos from that night were not very good, so Lila is modeling it here...the costume has held up pretty well I think - it about three years old and the only thing I have had to repair is the thread that suspends the legs. Coincidentally, Lila had told Lauren that she wanted to be a spider this year so now she is all set. Another benefit of this costume is that the size is very flexible so it can be worn by a variety of ages. It is a good one to keep in the dress up box or to pass on to a sibling, cousin, or friend.
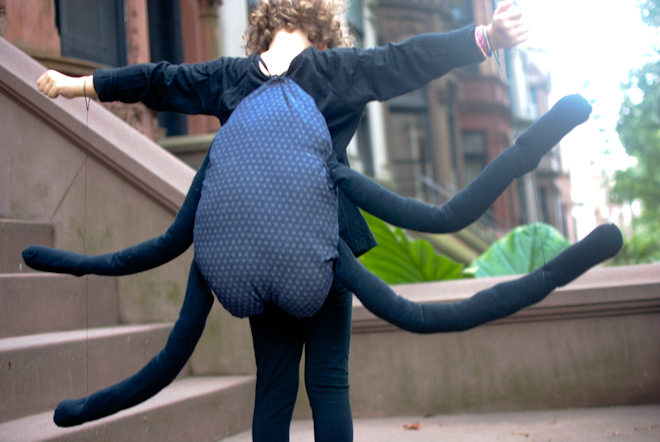
We started with a simple base of a black hooded sweatshirt and pants. The kids own arms and legs count as half of the spiders legs, and then I constructed the rest from black tights. I decided to make the spider body so that it could be worn like a backpack, with legs sticking out on either side. I threaded the legs, leaving several inches of string between them, and attached a hair elastic to the top. The elastic bands can be worn like bracelets so that when your child moves their arms all the legs move with them. Oliver loved climbing our stoop and window guards in this costume, looking like a giant spider scaling a building.

I took two pairs of opaque black tights and stuffed them with stuffing, only filling the legs. There are lots of types of stuffing available at crafts stores - polyester stuffing is available at most, but if you prefer cotton or other natural fibers purl soho has a good selection on their website. I also put a few strips of craft foam in the legs to keep them a bit less floppy but I do not think this step is totally necessary.
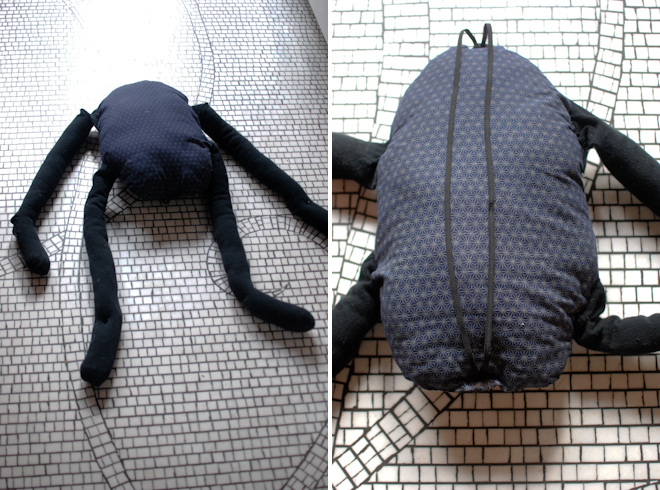
To make the body I cut two ovals of a dark patterned fabric. Pin the legs between the two layers of fabric (wrong sides together) so that the crotch end of the tights is on the outside, and the legs are sandwiched between the fabric ovals. Sew this area on the sewing machine to secure. Repeat this step on the other side, being careful to arrange the legs so that they will all be sticking out sideways from the oval when you turn it right side out...you will need to pin them in place and then bend the legs down through the bottom of the oval. When you sew the second pair of legs continue around the oval to the other side, just leaving the opening where the legs are sticking out open.
Turn the oval inside out so that the right sides are out, and the legs are on the outside. Stuff the body of the spider with more filling and sew the opening closed, either by hand, or by machine, whichever you find easier. To make the straps I used long piece of black elastic. I folded it in half and sewed the folded end to the top of the spider body, sewing over it several times to secure it. Sew the ends to the bottom of the body in the same way.
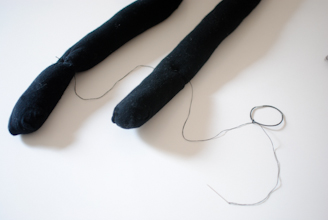
 Thread a needle with a double thickness of black thread (or for an even more durable solution a length of clear fishing line) and knot it at the bottom. The thread needs to be long enough to have the spider legs hang separately at the sides of the body. In order to make the legs stay suspended and move with your child, sew through the heel of the bottom leg, going from top to bottom a few times - this secures the thread, and it also flattens the heel creating a little bend in the leg so it looks more like a spider leg and less like the foot of your tights. Now continue through the top leg, leaving about 6-8 inches of thread between the two, repeating the stitching through the heel for this leg too. You should still have at least 12 inches of thread left on the needle. Secure this to a hair elastic by knotting it repeatedly. Repeat this whole process on the remaining legs on the other side of the spider.