
indigo dyeing
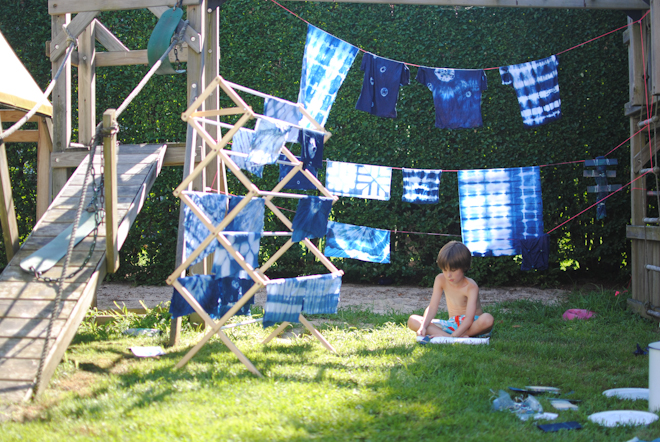
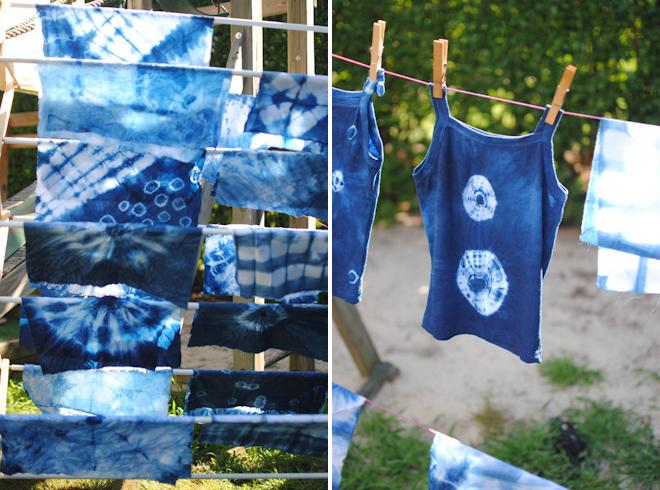
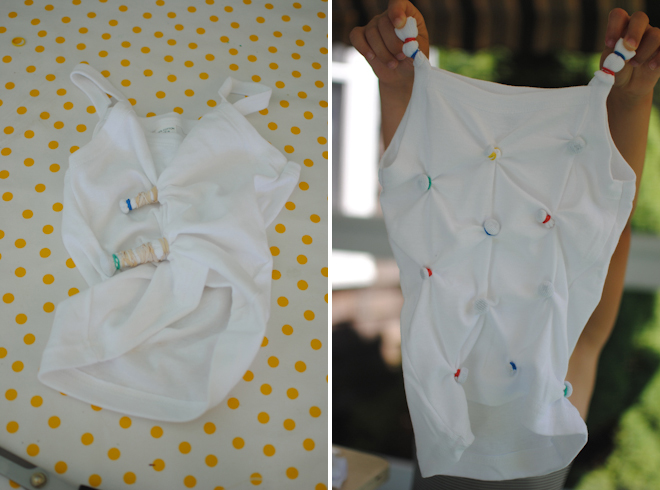
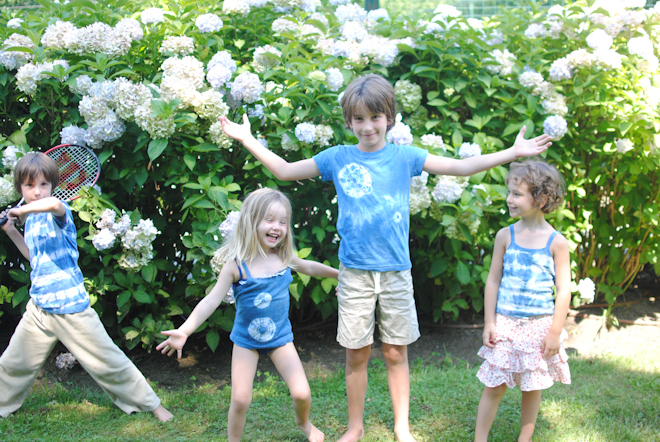
Once the kids finish camp we spend the rest of the summer at our house in Long Island. As soon as the first signs of summer appear I start dreaming of all the projects I hope to accomplish during that time, either with the kids or on my own. One activity that always seems fun for all of us is tie dyeing, but the end results are rarely anything I want to keep. Still, I started researching supplies, thinking there must be a way to direct the kids...maybe only using one color at a time for example. That thought led me to indigo dyeing. I love so many of the designs that skilled indigo artists are able to acheive, and knowing how much the kids have been enjoying origami, I thought the idea of concentrating on the folds that acheive the patterns would be fun for them. Sure enough, the boys were particularly into trying complicated folds and they made some incredible indigo patterns as a result. Rather than securing the folds with rubber bands we sandwiched them between pieces of wood or tiles. The parts covered with the wood or tile remained white, enhancing the geometry even further.
I bought an Indigo Dye Kit from Dharma Trading, which is a great source for supplies for projects like this one. They sell a large selection of garments that are ready to dye, as well as tote bags and quite a few varieties of fabric - you can find them all here. I chose a few pieces of clothing for each child, thinking they would have fun making something they could wear. I also bought a few yards of muslin, and a few yards of canvas. I find that often with this kind of activity the materials run out before the interest does -- the muslin was inexpensive and I knew it would occupy us for a while.
In addition, I bought some other supplies at the hardware store:
*A couple buckets with lids to prepare the dye in -- the dye keeps for days as long as it is not exposed to too much oxygen so the lids are important.
*An assortment of screws and nuts -- these are used if you want to make circular patterns -- look for screws that are a few inches long to make big bold concentric circles, like the ones on the tank top in the photo above.
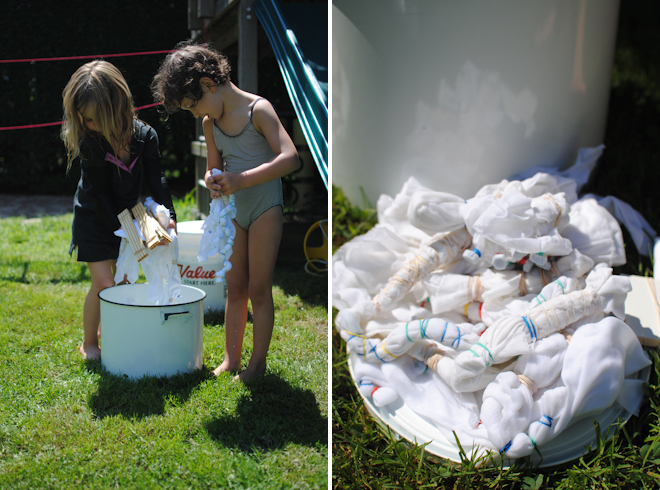
*Lots of rubberbands...little ones and big ones since the effects are quite different. String is good too.
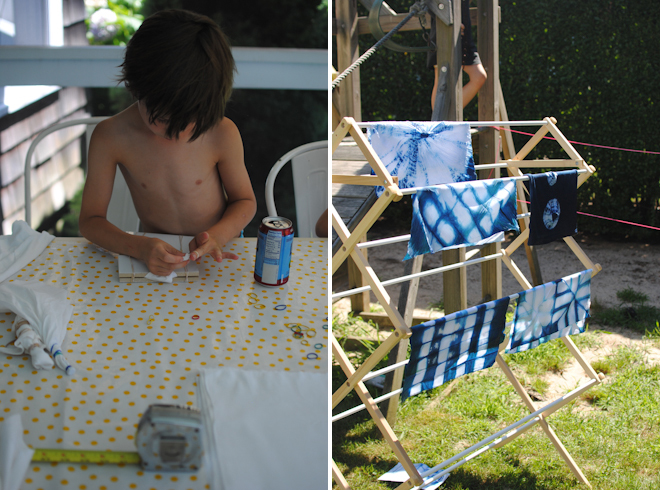
*Some wooden shims -- these worked well sandwiching the folded fabric, which creates white color blocks or grids. I also had some leftover tiles in the basement which we used the same way.
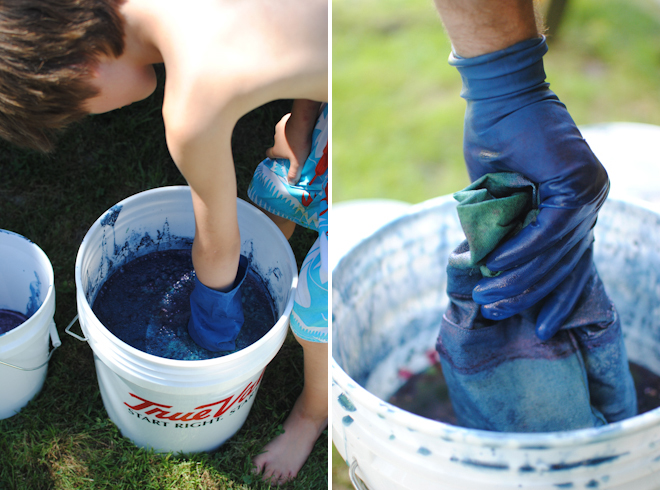
**You also need enough rubber gloves for everyone...I forgot to do this so we had to divide tasks accordingly!
Last but not least, you need to figure out where you will dry all of your dyed pieces. We borrowed a wooden drying rack from my parents, and strung up a makeshift clothes line on our play structure in the backyard.
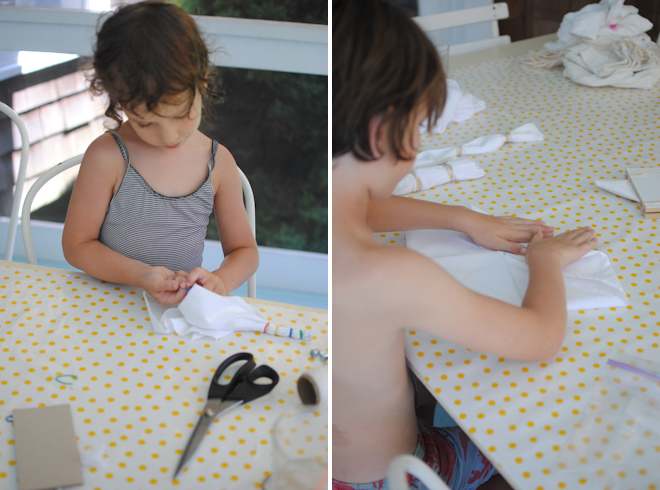
The muslin turned out to be a great idea. I bought 5 yards and cut most of it into 15 inch squares, keeping a few larger pieces as well. That allowed everyone to experiment as much as they wanted to without using up all of our materials. Once we completed a bunch of squares, and could see how things worked out, we were more prepared to dye some clothes.
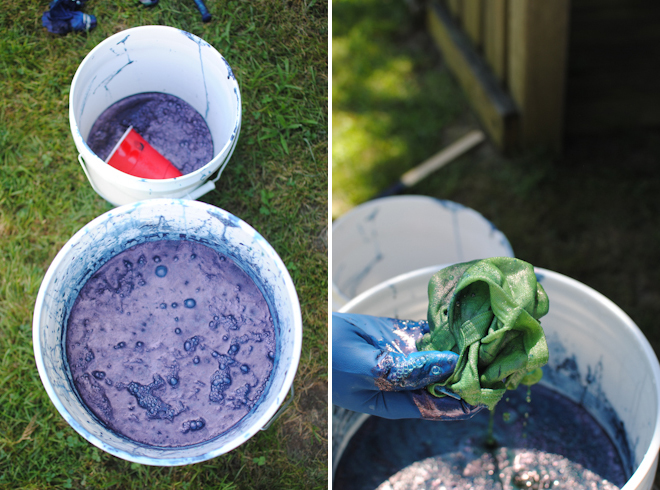
Adam prepared the dye and the rest of us got to work preparing our fabric. We experimented endlessly, so our range of patters was pretty diverse. One of the fascinating things to watch was the dyeing itself. You dip the fabric or garment in water first - I think this helps the dye absorb more evenly. As I mentioned, I neglected to buy was enough rubber gloves for everyone...as a result the kids did the dips into water, and Adam dipped everything into the indigo...Oliver could not be deterred so thankfully I found one more pair of rubber gloves, which he used for a few dips, and then I used to remove all the rubberbands and string and hang everything on our rack and clothes line. When you pull the fabric from the dye bath it first appears bright green and only after it is exposed to the air does it turn blue. It was quite beautiful to watch!
In addition to all the effects you can get with string, rubberbands, and complicated folding, you can also get a beautiful striped effect (known as ombre) by dipping different sections for various amounts of time. I tried this on a canvas tote bag that I bought at Dharma Trading as well.
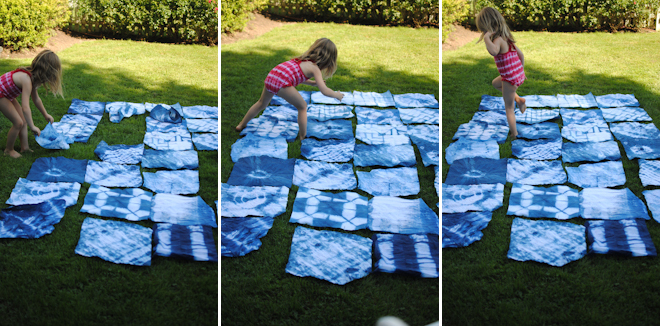
Not only did the muslin serve as a relatively cheap way of extending the experience, but I also now have a new project to work on...I think a quilt, or some quilted pillow cases, will be a great thing to make from all the squares. Bea and I played with the squares making a big grid but I will have to give some thought to other options. I'm not sure I really want it to look like such a patchwork. I found the book SHIBORI very inspiring before starting this project...I will have to take another look for inspiration on how to bring it all together. It will be fun to experiment with the different options for combining all the patterns and shades of blue.
Until then, we have some happy kids proudly wearing their work!
 ACTIVITIES