Entries by eclecticmom.com (250)

Thursday
Jun092011

asparagus risotto

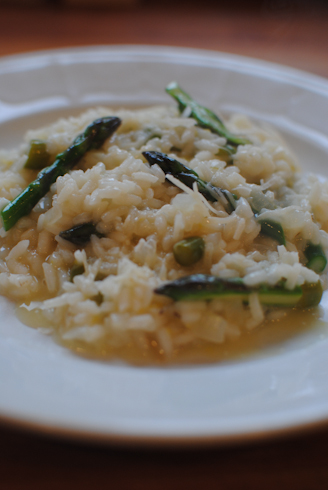
Risotto may seem intimidating to cook but it really just needs some attention. Once you are comfortable with the technique you can vary it in any number of ways. It is a delicious meal all by itself, or works well as a side dish. I make it often for parties, especially if I have a mix of vegetarians and meat eaters. For this recipe I decided to add the more tender and pretty tips of the asparagus later so that they retain their color and shape. The smaller chopped stems are added earlier to fully flavor the risotto.


6 cups chicken broth

1 bunch asparagus

2 tablespoons olive oil

1 medium onion, peeled and finely chopped

2 cups arborio rice

1/2 cup white wine

1-2 tablespoons butter

1 cup freshly grated parmesan cheese

salt and freshly ground pepper, to taste


Bring chicken broth to a simmer on the stove. Trim off top 2-3 inches of the asparagus and set aside. Cut the remaining stalks into 1/4 inch rounds, discarding the tough ends. Place a large pot over medium high heat and add olive oil. Add onion and saute until translucent. Add rice and cook, stirring, until rice appears translucent around the edges of the grains. Add wine, still stirring, and cook until absorbed. Add 1-2 cups hot stock, and continue cooking, stirring frequently, until stock is absorbed. Add the small rounds of asparagus and another ladle or two of stock, and continue stirring. Repeat this process until 3-4 cups of stock have been added. Slice the asparagus tips lengthwise and add them to the pot. Continue cooking, adding broth a ladle at a time, and stirring frequently, until rice is al dente. Remove from heat and stir in butter and parmesan. The risotto is done when the rice is just tender. If the liquid has all been absorbed and the risotto is too thick stir in a bit more stock to loosen it. Season with salt and pepper if needed - the broth and parmesan add lots of salt so you may not need any more.


Wednesday
Jun082011

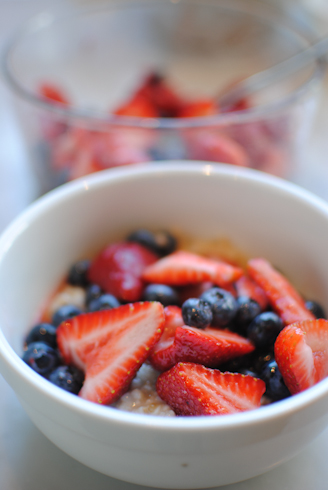
oatmeal with fresh berries


Now that local strawberries are popping up in farmer's markets I am inspired to eat them as much as possible. I am a fan of oatmeal year round, particularly McCann's steel cut variety. Fresh berries, a drizzle of maple syrup, and a bowl of oatmeal makes a pretty unbeatable breakfast in my opinion!


Tuesday
Jun072011

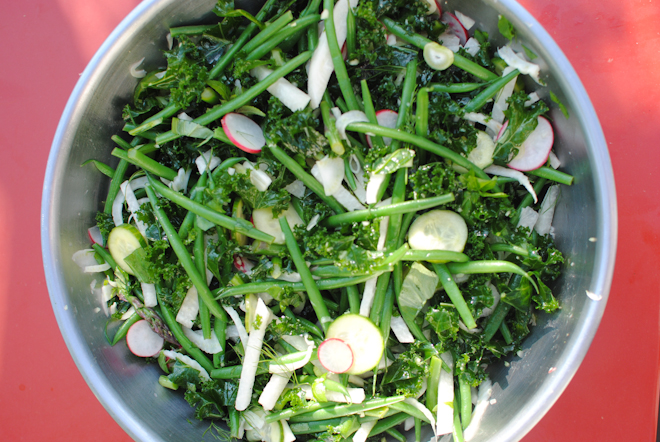
crisp spring salad


Now that the school year is coming to an end we are back in the potluck season. I always like to bring something healthy and am feeling inspired by all the fresh spring vegetables right now. I've made this twice in the past cople of weeks, swapping out the haricots vert and using sugar snap peas and shelled peas from the farmer's market the second time around. The beauty of this salad is that it remains crisp even after being dressed, so it is great for a party where things need to be made ahead, and it is big enough to serve a crowd. 


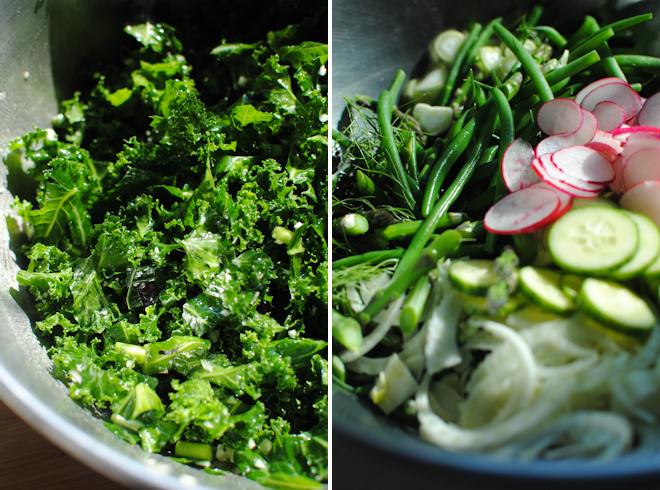
I wanted to have some greens mixed in with all the crisp vegetables so I started with the kale salad recipe I posted last week. I made it first and set it aside while preparing the rest of the vegetables. I blanched a bunch of asparagus, and 1 pound of haricots vert (see below). Add 1 small bulb of fennel, 1 bunch of radishes, 3 persian cucumbers, all thinly sliced, and 1 small jicama, peeled and cut into matchsticks.


For the dressing combine teaspoon dijon mustard, 1 teaspoon honey, 1/4 cup freshly squeezed lemon juice, 1/4 cup red wine vinegar, 6 tablespoons extra virgin olive oil, 1 teaspoon sea salt, and a few grinds of black pepper. 


Combine the kale salad, mixed vegetables, dressing, and a handful each of basil leaves and mint leaves. I also threw in some of the fennel fronds. Toss to combine.


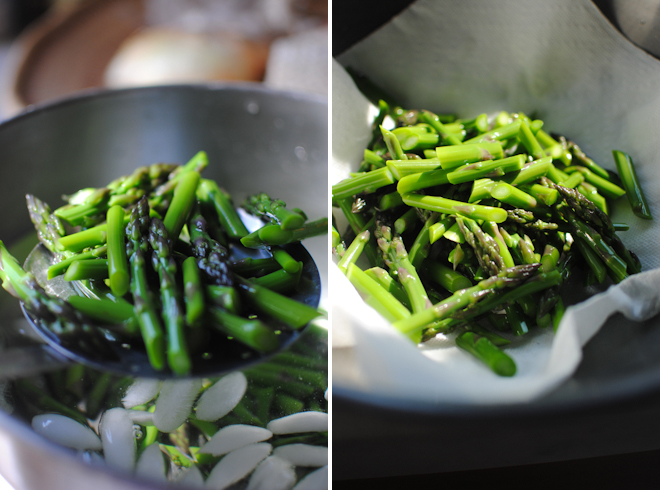
To blanch the asparagus and haricots vert bring a large pot of salted water to a boil. Cook the beans and asparagus separately since the cooking times will vary depending on how thick the asparagus is. I blanched the beans for about 2 minutes and the asparagus for 2-3 minutes.  Remove the vegetables using a slotted spoon or pair of tongs and shock them in an ice bath so they remain crisp and bright green. Once the vegetables are cool remove them from the ice bath and drain in a bowl lined with paper towels. 

Monday
Jun062011

pasta with salmon and peas

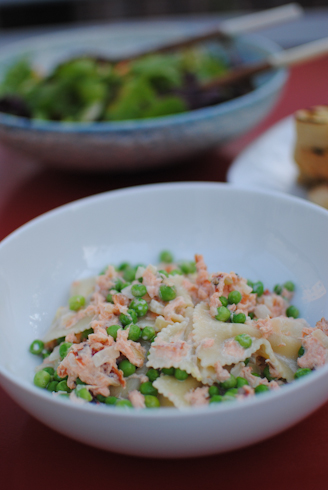
This is one of my kids' favorite dinners and you can make the whole thing in the time it takes to cook the pasta. I buy smoked salmon in the refrigerated section of the grocery store so I can have the ingredients waiting in the fridge anytime...if you cannot find it you can also use leftover salmon, or roast an 8 ounce fillet in a 450 degree oven until cooked through - about 10 minutes. Bring a pot of water to a boil, add salt and pasta, and cook until al dente. In the meantime, chop a small onion and saute in olive oil. Add a bag of frozen peas, and a pint of half and half. Break 8 ounces of smoked salmon into little pieces and stir into pan with cream and peas. Simmer until heated through. Drain pasta, return to pot, and toss with salmon mixture. Season with a little salt and freshly ground pepper and serve.


Friday
Jun032011

father daughter painting


My brother-in-law Ben studied art in college but has not done a lot since...until having a daughter. Lila is quite the budding artist herself. She has an easel in her room and every time I am there I find a new work in progress. Many are collaborations with her dad. He gets home a half an hour before her bedtime and a little painting is a perfect quiet activity for them to share.

Thursday
Jun022011

roof top gardening


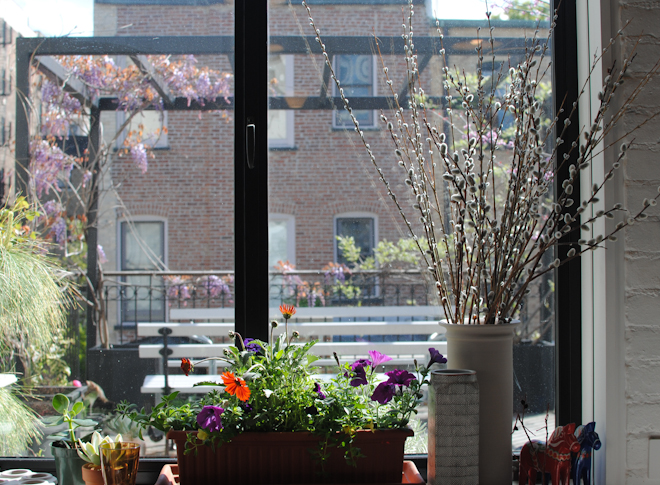
When spring finally arrives it is such a relief to me...after months of cold dark days I practically skip down the street when all the trees and bulbs finally begin to bloom. I am really not a gardener (I've killed way to many houseplants over the years) but somehow having a roof deck has really inspired me to try to learn some new skills, and cultivate a nice outdoor space. The first year that we were able to plant I hired a woman from a lovely shop called Grdn and she really got us off to a great start. My friend Lindsey also gave me invaluable help along the way, suggesting a few more trees and plants and giving lots of advice on how to care for everything. Now that there are enough perennials established, it is up to me to fill in the holes each year and finally take responsibility for tending it all. A few weeks ago my sister Lauren and I took our daughters to the Brooklyn Botanic Garden's plant sale. The girls were in heaven...each dragging a big red wagon through the tent, begging to add "just one more" pot to the growing pile. 


Before we renovated our house the rooftops were not developed at all. They were just blacktop spaces with rails around them. Once we decided to improve them I knew I wanted a structure to support climbing vines. Wisteria is the star of the show right now...seeing the vines get more tangled and thick each year is such a pleasure. We have two different varieties which seem to be on slightly different schedules which has worked out well...as one finishes blooming the other starts.


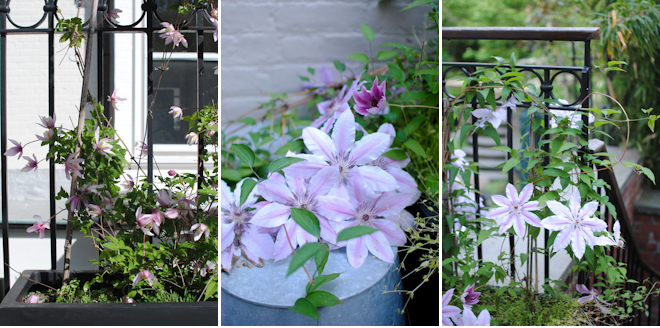
In addition to the wisteria we have lots of other climbing plants as well. I have a vision of the deck becoming more and more private as the plants slowly cover all the railings. Clematis are among my favorites. There are many varieties but I really love the papery pink and purple blossoms that are in bloom on the deck now. I am also trying my luck with a climbing rose - it struggled last year but maybe looks a little better this year? At the plant sale I bought a bouganvilla with a little trepidation. They grow well in hotter climates so should do well on the very sunny rooftop but sadly it won't survive the winter here...not the wisest choice but I could not resist it.


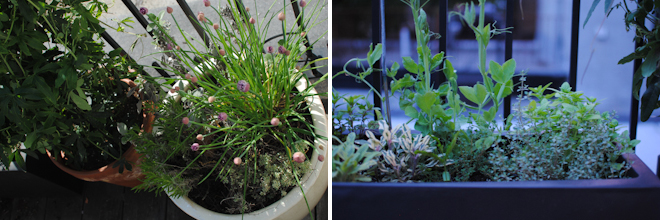
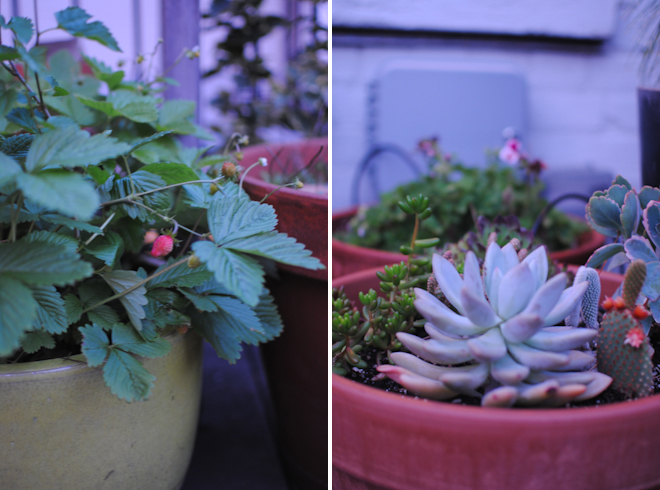
In addition to all the climbers we have a few large planters dedicated to herbs, which are so pretty, and make summer cooking that much better. Under our kitchen window is a large lavender plant which gives of such a lovely smell, as well as lots of strawberry plants - a favorite of the children! 


Not only does this all add up to a very pretty place to look at from the kitchen window, it allows the kids to get some treasured outside which can be scarce with urban living. Letting them help plant and water, and tend to the herbs, is a great experience for them.


Wednesday
Jun012011

kale salad


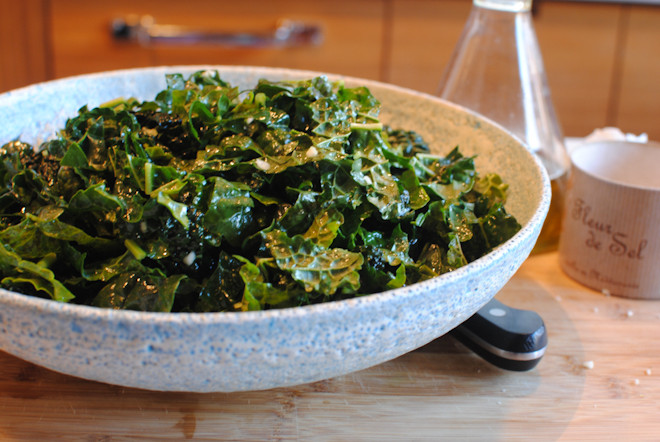
I've been noticing raw kale salad on more and more menu's recently but it really caught my attention when I saw this recipe on my friend Andrea Gentl's blog. I was particularly intrigued with the idea of "massaging" the kale with the garlic, salt, and olive oil. I decided to give it a try and it was delicious. I followed Andrea's recipe but I squeezed the juice of half a lemon over it when I served it. Much to my amazement, my kids (who are very anti green leafy vegetable) liked it too.


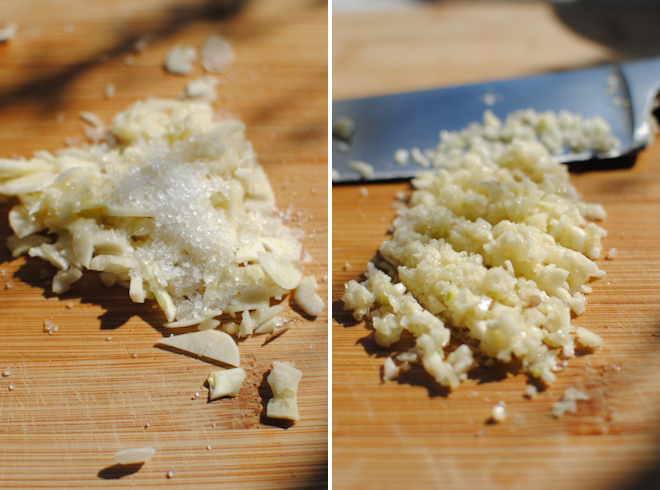
P.S. When I was in culinary school I learned that finely chopping garlic is a lot easier if you mix some coarse salt into the garlic once it is roughly chopped. It is a good technique for this recipe since it produces a nice uniform mince. 


Monday
May302011

barbie cake


Although I loved baby dolls as a little girl I never liked Barbie. As I got older I learned to dislike her for all she represented, but long before that, I just didn't get how to play with her and did not understand why so many of my friends loved her so much. As a result I was bewildered, and a little dismayed, when my daughter became obsessed with her before her third birthday. I think it started while we lived in Cape Town, South Africa: we would visit the local video store and Bea (at age 2 1/2) would wander in and be drawn straight to the row of pink videos that I never would have even seen...they were at knee level for me but that was eye level for her. My sister encouraged me to let go of my own disdain and let Bea live out all her Barbie dreams. I listened, and for her third birthday she got her first Barbie doll as well as this Barbie cake. She loved it so much that she asked for another one when she turned 4. I had made my first Barbie cake about 10 years earlier when my young sister-in-law turned 5 or 6. Once you get over the initial horror it is actually a pretty fun cake to make. I used this Barbie because her leotard is painted on which works perfectly as the top of her dress, and she can be washed without doing any damage to her outfit.


The photo above is the first cake I made for Bea. I learned a few things...as you can see in the photo, I had a height issue. Barbie's unnaturally long legs were taller than my very tall cake layers! Her feet needed to stick right through the bottom in order to get the cake to start at the waist. Luckily I had an almost used up roll of duct tape and some cardboard rounds. I taped the tape roll to the cardboard round and cut a hole in the center for the feet to poke through. I had to cover this whole situation so tucked white cupcake papers around it. Not perfect, but it covered the mess! 


In order to get the full tiered skirt I baked two cake layers in metal bowls. Stack your bowls to get an idea of whether they will give you the shape and height you want. You will need to determine whether the bowls you are using need one recipe of cake batter or two. The easiest way to determine this is to fill regular round cake pans (as many as your batter calls for) with water about 2/3 full; then pour that water into the two bowls to see if it fills them about 2/3 full. If it does, then you should have no trouble. If it does not fill them you will need to double your usual recipe. You may end up with extra batter but you can bake it in another bowl or make a few cupcakes. By the way, here is a great chocolate cake recipe - it is super moist and keeps for days. Bea wanted a lemon cake and since I did not have a favorite recipe I saved myself the trouble and used a box mix for that one.


Once the cake is baked and cooled you will need to cut holes in the centers where you will insert Barbie's legs. In the photo below right you can see the tape roll under the cardboard round.



I use a variation on Martha Stewart's butter cream frosting recipe. The original recipe is very rich, and a cake like this which is heavily decorated and uses lots of frosting, so I cut back on the butter. The butter is what makes the frosting so firm and stable but I find that it still holds its shape very well with 75% of the butter. Everyone has different tastes...you can use your own preferences to decide how much to use. Also, this is a very large batch of frosting. You will not use all of it. I like to make a giant batch knowing that it leaves room for error - when I am mixing the colors I use a small bowlful at a time knowing I can add more plain frosting if the color gets too dark. Or that if I do something I really do not like I can scrape it off without having to make more frosting. If you are a confident decorator you can make a smaller batch of frosting and avoid the waste.


Once you have the layers stacked and the Barbie in place do a "crumb coat." By spreading a thin layer of frosting over the cake you give yourself a nice base to pipe on, and you seal in all the crumbs so that they do not get into your frosting. After you apply the crumb coat place the cake in the refrigerator for at least 15 minutes or until the frosting is firm.


You can vary the way you frost the cake to suit your whim. On the first cake (top photo) I just  spread a layer of pink frosting on the whole skirt and then piped some yellow lines and ruffles on it to give it a little princess-like embellishment. For the 4th birthday version I opted for a layer of ruffles over most of the skirt. 
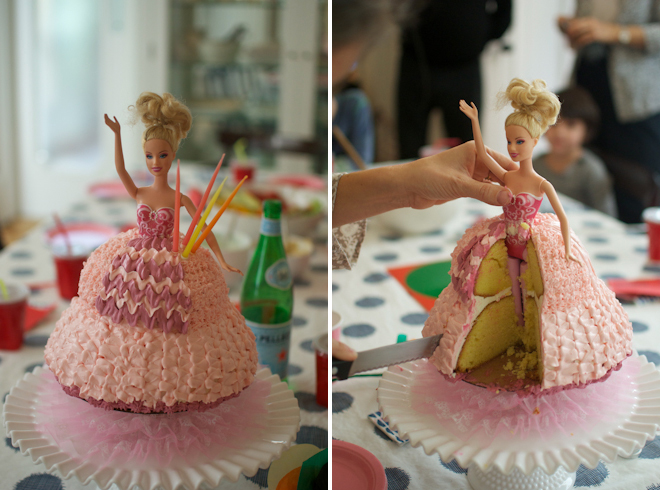


Initially the skirt was only pale pink and something made me add a little purple ruffle across the front. Not sure it really added anything though. 


A few other tips: Long skinny candles (or candles with some sort of little holder on the end) are helpful so you don't have to make big holes when you sink them into the frosting. Also, hold onto Barbie as you start slicing the cake. The cake can get off balance pretty easily up on that tape roll and it would be a shame to have the whole thing topple over! Last but not least, if you want some frilly ruffles to tuck between your cake plate and the elevated cake I found this and was happy with how it filled the gap.


Friday
May272011

artichokes


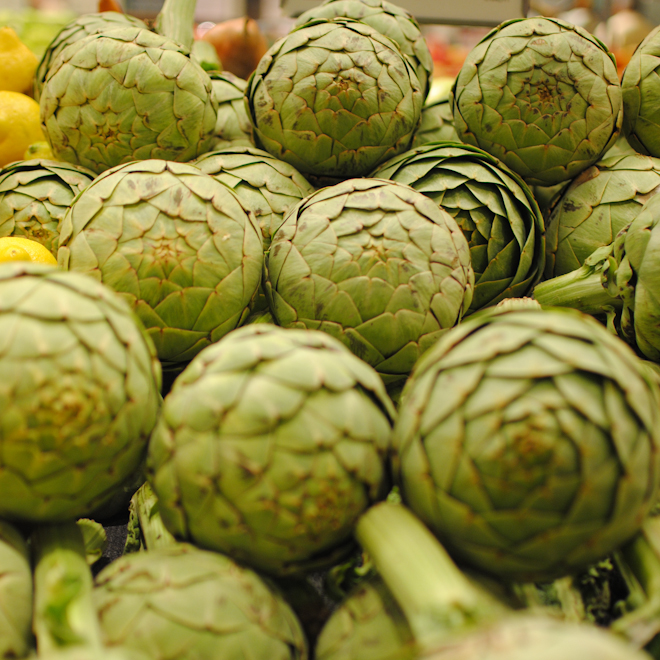
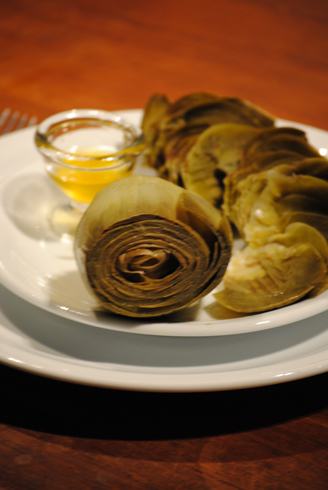
Spring is the season for so many wonderful vegetables, and artichokes are one of my favorites. They seem like a special treat but really they are so simple to make. Fill a large stockpot full of water and squeeze the juice of a lemon into it, adding the rinds too. Add some salt and a tablespoon or so of olive oil. Trim the stem of the artichoke (only a little) and cut off the top third of the leaves. If any thorny leaves remain use a pair of scissors to snip them too. Add the artichokes to the prepared pot of water as soon as they are trimmed to prevent discoloring. Bring the pot to a boil, reduce to a simmer and put the lid on. Continue cooking for 60-90 minutes, or until the leaves come off easily and are very tender. I like to eat them one leaf at a time, dipping each in melted salted butter. 

Wednesday
May252011

chicken salad with cashews


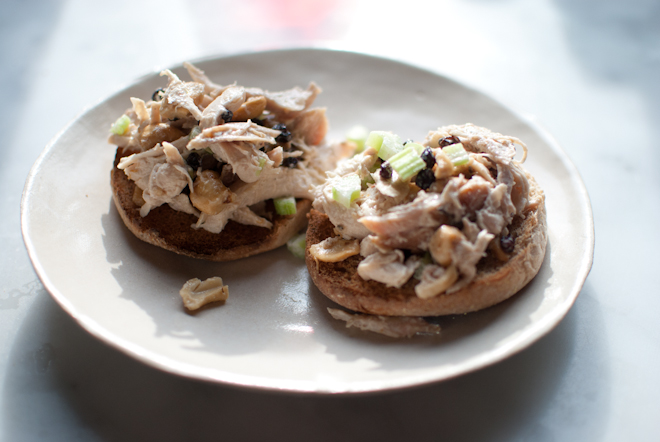
When we have a lot of leftover chicken this salad is the first thing I think of making.  The secret lies in the dressing, which was inspired by my friend Kyra. She considers herself a sandwich aficionado, and loves coming up with new combinations. During one of her visits (she lives in Holland) she rummaged through our fridge and made a sandwich that was an english muffin spread with mayonnaise and topped with shredded roasted chicken, Mrs. Ball's Chutney, and nice coarse sea salt.  We all loved it so much it was coined 'The Kyra Sandwich", and we continue to make it to this day.


Mrs. Ball's Chutney is one of the things we always brought back with us after a visit to see Adam's family in South Africa...it is as ubiquitous there as ketchup is here. Several years ago I almost fainted when I found it randomly among the chocolate bars, candy, and beer in a corner of Fairway. It is now available on Amazon too, which is a good thing, since it means I can share this recipe without fear that it is just a tease. If you are hesitant about ordering chutney for chicken salad alone, it is delicious with many many things...and if you have kids who feel everything is better with ketchup, they may be open to this alternative...I know mine are. As much as I hate letting them dip too many morsels of otherwise healthy food into sugary sauces, I do think a variety of flavors at least helps them develop a wider range of tastes.


To make the chicken salad I shred or chop the chicken into bite size pieces and mix in a generous amount of chopped celery, cashews, and either currants or raisins. For the dressing mix mayonnaise with a big spoonful of Mrs. Ball's Chutney and some juice and zest of a lemon. Season with sea salt and pepper to taste.