Entries by eclecticmom.com (250)

Friday
Aug192011

garden herb greek salad


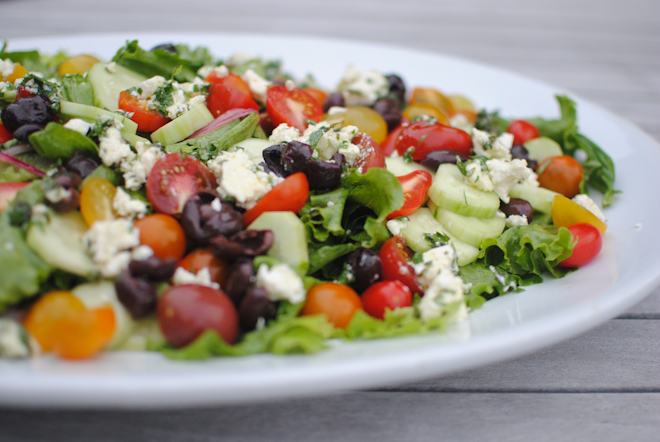
In August, when all the ingredients are in their peak season, I love using all the herbs in our garden to really boost a simple greek salad by adding them to every component. Served on a large platter it makes a beautiful centerpiece for a simple dinner...especially if you are shopping at a farm stand or farmer's market and find beautiful little tomatoes in an array of colors. We ate this one with yogurt marinated grilled chicken, grilled pitas with fresh herbs, and corn on the cob. Although this recipe sounds like a lot of steps each one only takes a minute or two. 


GARDEN HERB GREEK SALAD

1 small red onion

3 tablespoons of red wine vinegar

2 teaspoons sugar

1/2 teaspoon salt

1 tablespoon freshly chopped dill

1/2 pint feta

1 tablespoon freshly chopped parsley

1 tablespoon freshly chopped basil, plus 1 cup basil leaves

6 tablespoons basil oil (can substitute regular olive oil)

1 head romaine lettuce

1 pint cherry tomatoes 

3 kirby cucumbers

1/2 cup black olives

1 teaspoon digon mustard


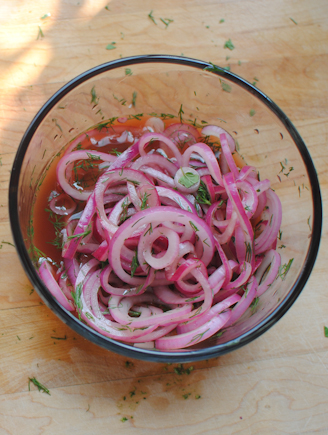
Peel and thinly slice the red onion and put it in a small bowl. Add red wine vinegar, sugar, salt and dill and stir to combine. Set aside for 30 minutes, stirring occasionally, until the onion is softened.


Drain any water from the feta and sprinkle with the chopped parsley and basil. Drizzle one tablespoon of the basil oil over the feta and set aside. 


Chop lettuce and wash and dry in a salad spinner with basil leaves. Place greens on a large platter. Add cherry tomatoes, halving the largest ones and add to platter. Peel and slice cucumber and add to platter. Remove pits from olives: this is done easily by pressing on them with your thumb to split them open, and add to salad. 


Remove onions from vinegar, reserving the vinegar mixture, and add to the salad. Add mustard to the vinegar and whisk to combine. Add remaining 5 tablespoons of basil oil and whisk. Add dressing to salad and toss to combine. Sprinkle feta cheese on top and serve. 


You can prepare all the components of this salad a half an hour in advance but do not add the dressing until ready to serve.

Thursday
Aug182011

ode to basil


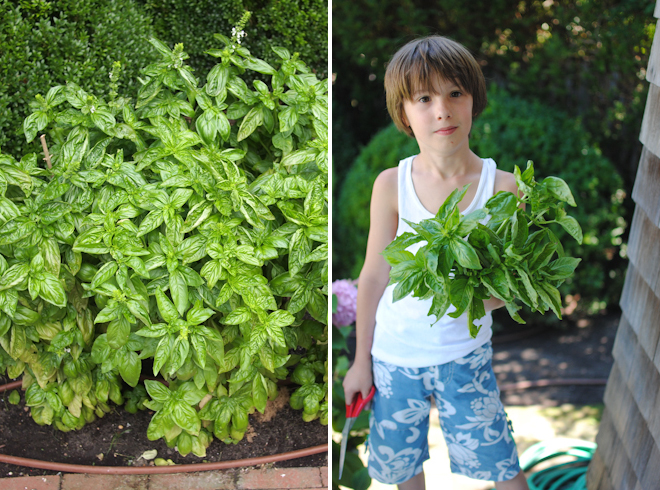
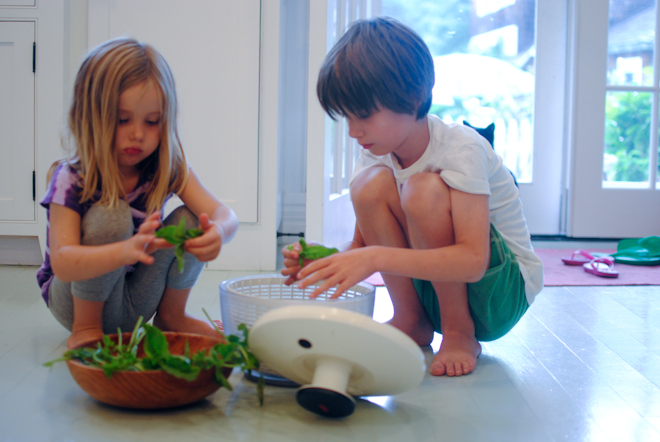
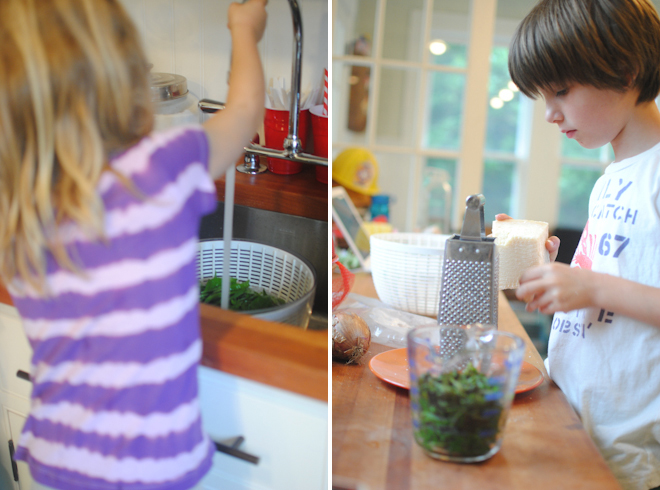
Our basil plants are growing faster than we can use them these days so we are thinking of all the ideas we can...pesto, basil chiffonade on sliced tomatoes, basil oil for salad dressings, basil simple syrup, etc. Luckily I have two fantastic helpers in the kitchen. 


BASIL PESTO (makes about 2 cups)

Blanching the basil keeps the pesto a nice bright green but if I am in a big rush, and am making pesto to use immediately, I sometimes skip this step -- the result is a pesto that turns brown quickly but is still delicious.


1 large bunch basil, stems discarded 

1/3 cup pine nuts

cup 1/3 grated parmesan cheese

1 cup  extra virgin olive oil

1 teaspoon salt

1 tablespoon lemon juice


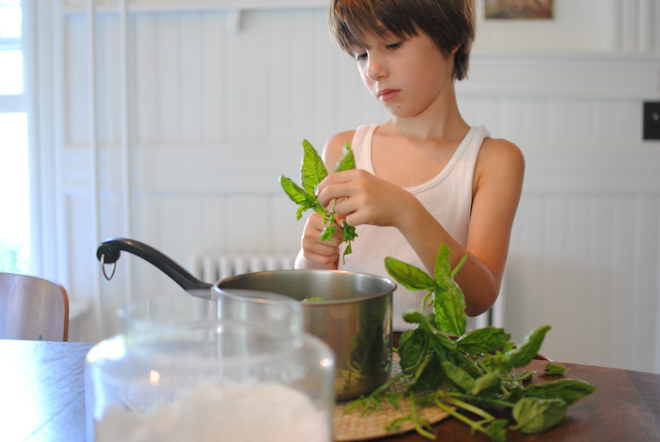
Bring a pot of water to a boil. Blanch basil leaves for 2-3 seconds or until they turn bright green and transfer immediately to an ice bath. Drain and squeeze out excess moisture. Our bunch of basil produced about 1 1/2 cups of blanched leaves. 


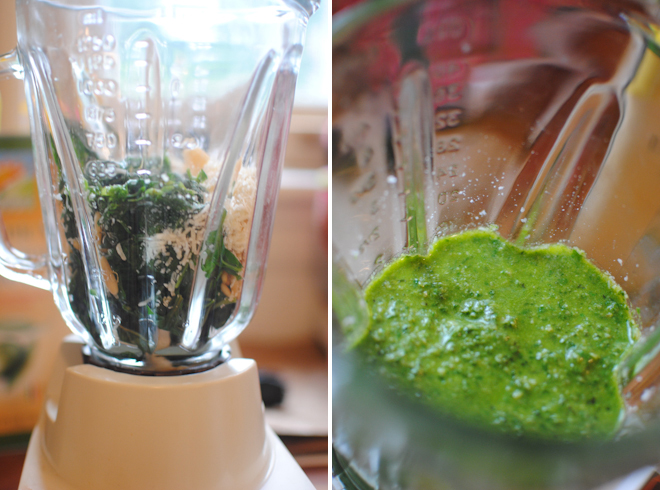
Place basil, pine nuts, parmesan, and olive oil in a blender and puree until combined but not totally smooth. Add salt and lemon juice and quickly blend to combine. If you are not using the pesto immediately store in an airtight container with a little olive oil drizzled over the surface.


If you really have tons of basil, and want to make several batches, you can also freeze it. For easy portioning when it is time to thaw it out try freezing in icecube trays. Once the cubes are solid transfer them to a ziploc freezer bag and just thaw a few cubes at a time.


BASIL SYRUP

Basil syrup makes the most delicious and refreshing basil citrus soda when combined with seltzer and the juice of a lemon or lime. Rather than the traditional 1:1 ratio of sugar to water we made a slightly less sweet version.

a few large sprigs of basil

2 cups sugar

3 cups water

Place all ingredients in a pot and bring to a boil. Boil gently for about 5 minutes then turn off burner and allow mixture to sit in pan for 30-40 minutes. Transfer to an airtight container and chill before using.


BASIL INFUSED OLIVE OIL

2 cups basil leaves

2 cups olive oil

pinch salt

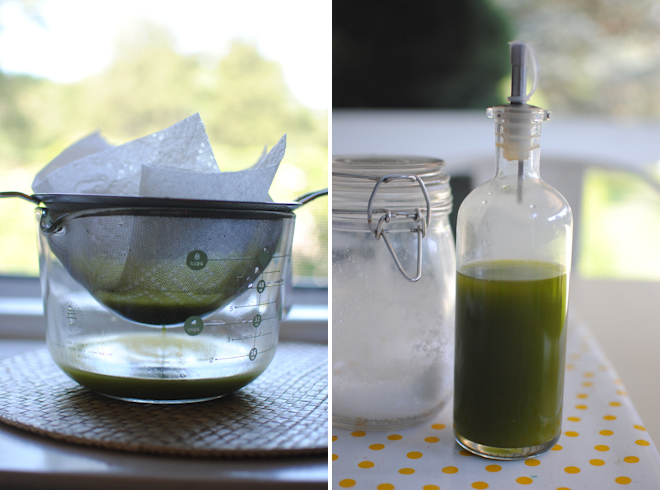
Blanch basil leaves in boiling water for a few seconds and immediately transfer to an ice bath. Dry on paper towels. Place in blender with oil and salt and puree. Strain through a fine mesh strainer lined with a paper towel. Store in a glass container in the refrigerator.


BASIL CHIFFONADE

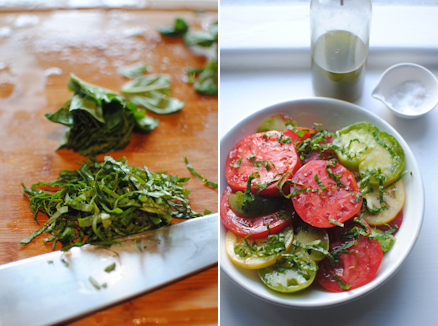
Large leaves of basil can sliced into beautiful thin ribbons -- stack large leaves and roll into a tight bindle. Thinly slice crosswise. It makes a perfect topping for a sliced tomato salad or a garnish on top of pasta.


Wednesday
Aug172011

grilled pitas with fresh herbs


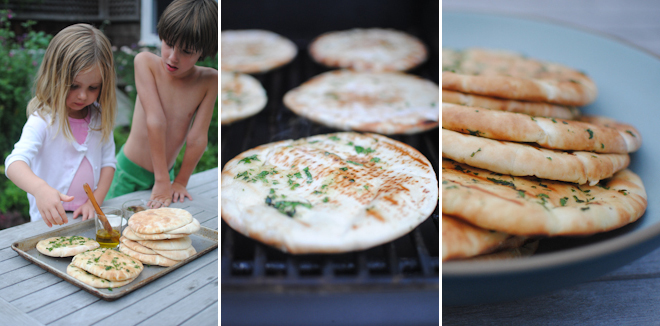
These grilled pitas are a family favorite, and an easy way to let the kids help with dinner prep. They love brushing the bread with olive oil and sprinkling on the salt and herbs. You can chop any herbs you like but since I always make them when we eat yogurt marinated grilled chicken I often use chopped cilantro from that dish and mix in some chopped parsley. Use a pastry brush to lightly coat the pitas and sprinkle them with a little sea salt and some herbs. Place them on the grill, turning when they are very lightly browned. If they start to puff up they are done, but this does not always happen. Serve immediately...I always make sure these are the last thing grilled since they are really best when nice and hot and they are ready in about 2 minutes.


Tuesday
Aug162011

yogurt marinated grilled chicken


This yogurt marinade keeps chicken moist on the grill, and adds a lot of flavor. I use half the marinade for the chicken, and add some chopped cucumber to the rest making a nice raita to accompany the meal. I always make grilled pitas with herbs when I make this dish - they are a favorite with our family...I'll post the how to for them tomorrow.


YOGURT MARINADE

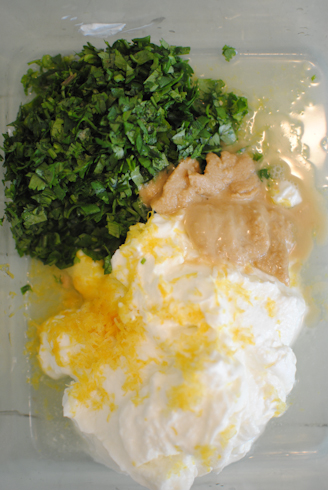
1 cup plain greek yogurt

1 clove garlic, finely minced

1 teaspoon salt

Zest and juice of 2 lemons

1-2 tablespoons tahini

3/4 cup freshly chopped cilantro


Combine all ingredients in a medium bowl and whisk to combine. 


I used half the marinade for about 3 1/4 pounds of thin chicken cutlets, to serve 6 adults and 4 children. If you are cooking for a smaller group just use as much of the marinade as you need to coat the chicken. Add about a cup of grated or finely chopped cucumber to the remaining marinade to make raita. 


Allow chicken to marinate for at least an hour, and up to 4 hours. I find that chicken is prone to sticking, even on a very hot grill. To help prevent this I fold up a paper towel and pour a couple tablespoons of oil on it. Using a pair of tongs rub the oil onto the grill grates. The grill should be medium hot for this dish - hot enough to get some nice browning, but low enough that you do not burn it while being sure the chicken is fully cooked. Grill for a few minutes on each side, or until chicken is cooked through. 


Monday
Aug152011

Inspired by our teachers: newspaper tube sculpture


One thing I am always looking for is an inspired arts program for the kids. We found just that at Collage Studio -- a summer camp program by Studio Creative Play. The director Khahtee, as well as all the teachers and counselors she hires, are so full of ideas when it comes to creating open ended activities for the kids...they really let their imaginations run wild. It was our second summer at the camp and we loved every minute of it.


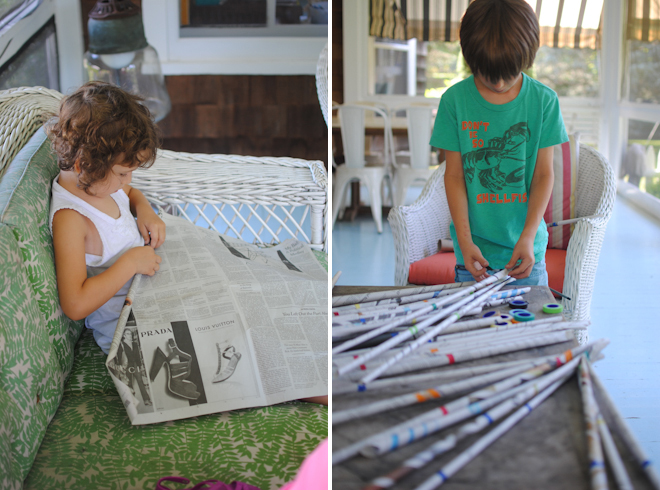
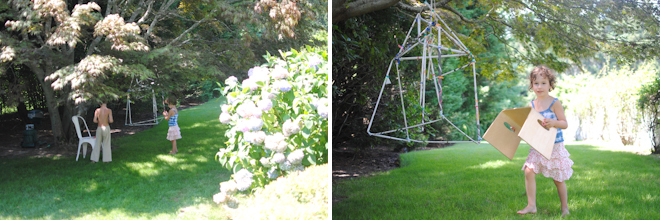
A couple weeks ago, when I dropped of Bea at camp in the morning, there was a group working together to make long tubes out of tightly rolled newspaper and colored tape. Later that day, at pick up, I found that they had created a room sized sculpture from all the tubes. Strings had been hung from the ceiling and draped to the edges of the room, and the tubes had been added forming all sorts of things...Bea pointed out the "castle" she had made, as well as a "bridge" that she and Lila had helped with. It really went on and on, and I could just imagine the kids having a blast turning the whole room into one big creation.


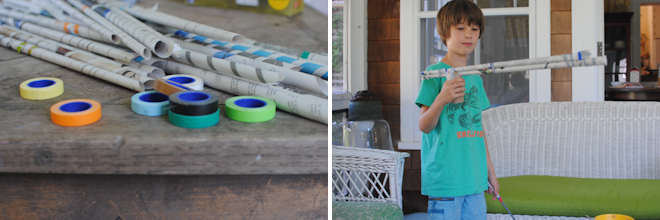
I thought that this project would be fun to try at home so we gathered some old newspaper and I pulled out some rolls of colored tape I had stashed away. Sure enough, everyone was intrigued. 


I should not have been surprised to see that the boys immediately made weapons...


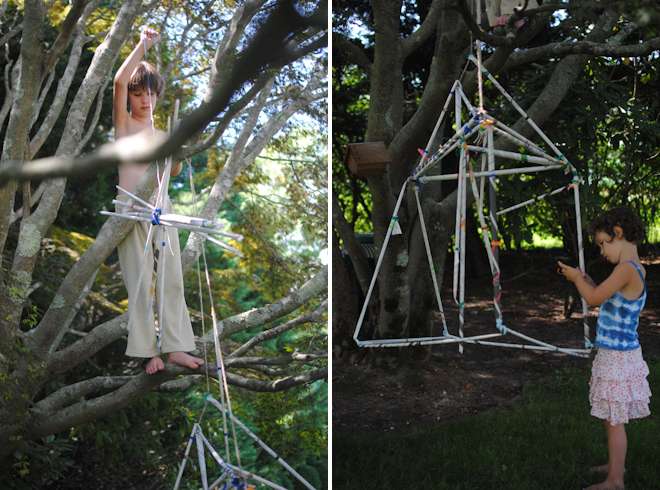
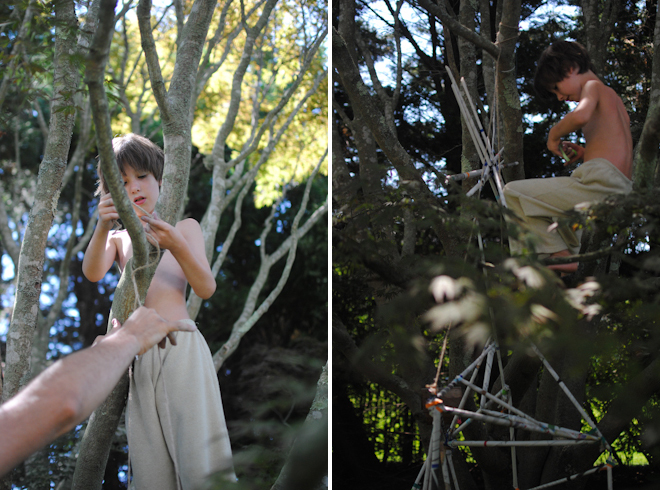
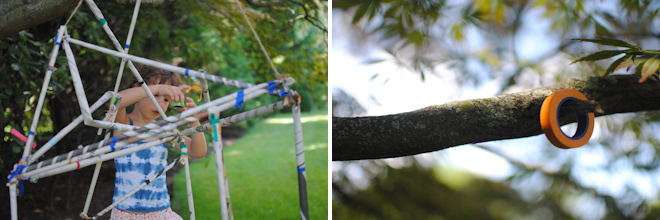
Thankfully, I had Lila to show them other possibilities! She can really get into this kind of project, and in true Lila form, she set to work making a house-like construction. It soon became clear that the porch where we were working was not the right setting. We all agreed that her creation would be even better hanging under a tree. That was a sure fire way to get Oliver to abandon his weapons and scurry outside, up into the tree, to help secure the sculpture.


I really love this kind of activity...it encourages creativity and teamwork and can easily take up hours, or even spread over a few days. In this case I liked the end result...the hits of color from the tape and the look of the newspaper were really great...but even when the final product is less than beautiful the kids have so much fun making it, and that is all that really matters. 

Friday
Aug122011

quick pickles


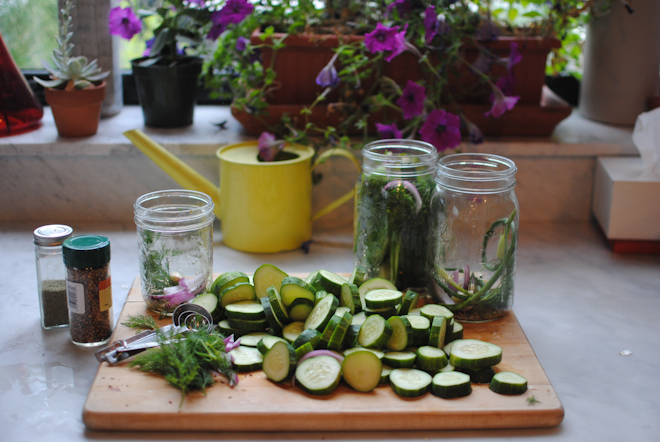
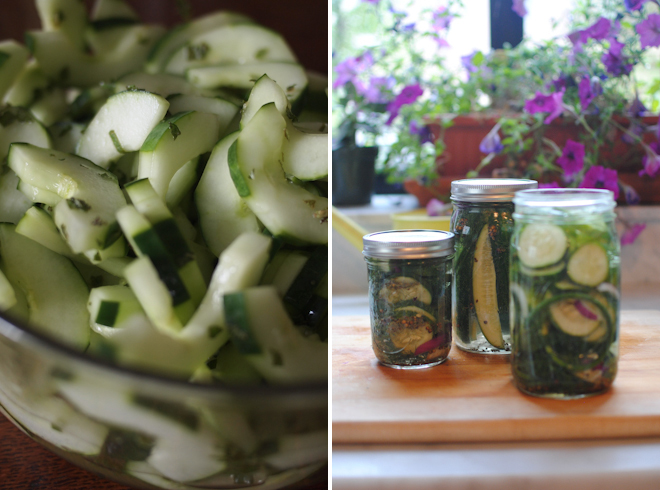
I have made quick pickled cucumbers for years and have always done it the same way...I thinly slice some cucumbers (sometimes I also thinly slice a red onion) and sprinkle them with salt, sugar, and vinegar. Sometimes I add some fresh dill, sometimes mint. The cucumbers are softened and full of flavor within half an hour, and we eat the whole thing right away as a salad (photo below left).


Then, a month or so ago I was talking to my friend Rachel and she said she was making quick pickles with her son Caleb. We always compare recipes, and often share ideas for what to make for dinner, and this time was no different. It turns out, she was making a quick pickle recipe by Mark Bittman. I love his columns so I decided to look and see if I could find the pickle recipe online...curious to see what his favorite quick pickle is. 


I found the recipe here and discovered a whole new technique! To me, vinegar has always been a key ingredient, but Bittman does not use any vinegar at all in his recipe. Instead, he makes a salt water brine. I had to try them (photos above right and top) and I must agree that they are delicious. 


There are some differences between the two - I think that when I want a pickled cucumber salad as a side dish (for example, it goes really nicely with roasted salmon or grilled lamb) I will probably stick with my own method. But for a real pickle...a crunchier, really fresh tasting pickle, that can be kept in the refrigerator for about  a week, the Bittman pickles win. 


In the link you will also find another way to make quick pickles...one which does use vinegar, but like Bittman's version, are really pickles, as opposed to mine, which are more of a pickled cucumber salad. We made a jar or two of those as well...they were good, but not as crisp and fresh tasting as the ones without the vinegar.


To make my quick pickled cucumber salad use 2 cucumbers. I peel them, leaving strips of peel in tact, and remove the seeds. Slice thinly and place in a bowl. Add 1 teaspoon of kosher salt, 2 tablespoons sugar, and 4-5 tablespoons vinegar. You may choose the type: white wine vinegar, rice wine vinegar, or champagne vinegar all work well. Stir the cucumbers to combine. Add a heaping tablespoon of finely chopped fresh mint or dill and stir again. Set aside, stirring occasionally, for about 30 minutes before serving.


Wednesday
Aug102011

swiss chard pie


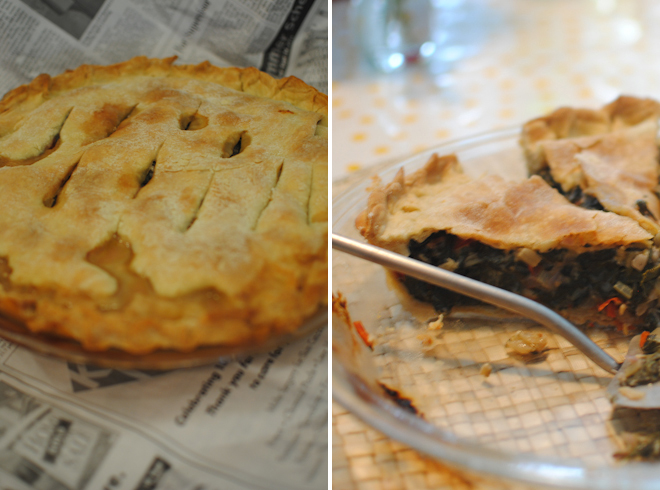
My aunt and uncle visited us from California this June and at one of the many dinners we all had together my uncle brought this swiss chard pie. He has been eating vegan for the last few years and this recipe from Martha Stewart's Everyday Food has become one of his staples. He bakes this one at my parents house and brought it to us wrapped in newspaper, still warm. It was delicious! 

Monday
Aug082011

indigo dyeing


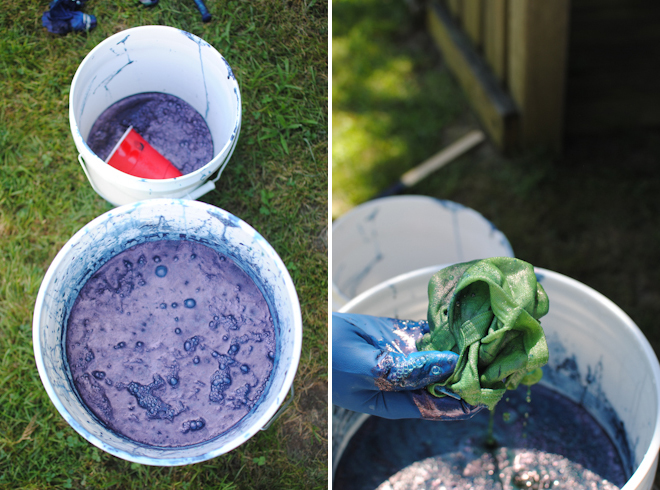
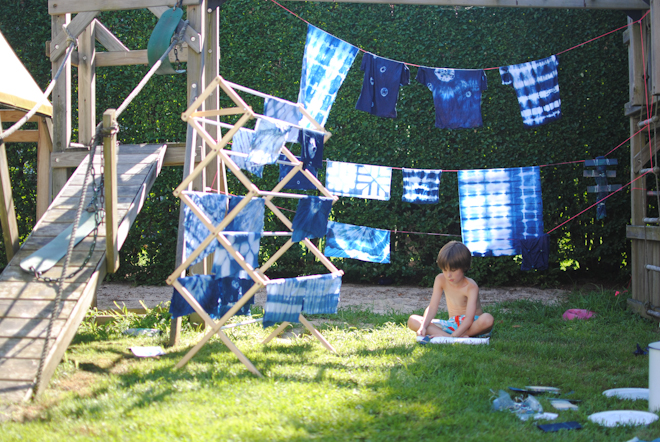
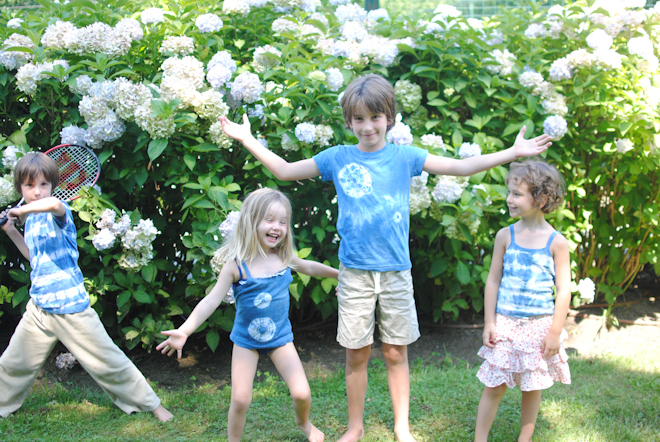
Once the kids finish camp we spend the rest of the summer at our house in Long Island. As soon as the first signs of summer appear I start dreaming of all the projects I hope to accomplish during that time, either with the kids or on my own. One activity that always seems fun for all of us is tie dyeing, but the end results are rarely anything I want to keep. Still, I started researching supplies, thinking there must be a way to direct the kids...maybe only using one color at a time for example. That thought led me to indigo dyeing. I love so many of the designs that skilled indigo artists are able to acheive, and knowing how much the kids have been enjoying origami, I thought the idea of concentrating on the folds that acheive the patterns would be fun for them. Sure enough, the boys were particularly into trying complicated folds and they made some incredible indigo patterns as a result. Rather than securing the folds with rubber bands we sandwiched them between pieces of wood or tiles. The parts covered with the wood or tile remained white, enhancing the geometry even further.
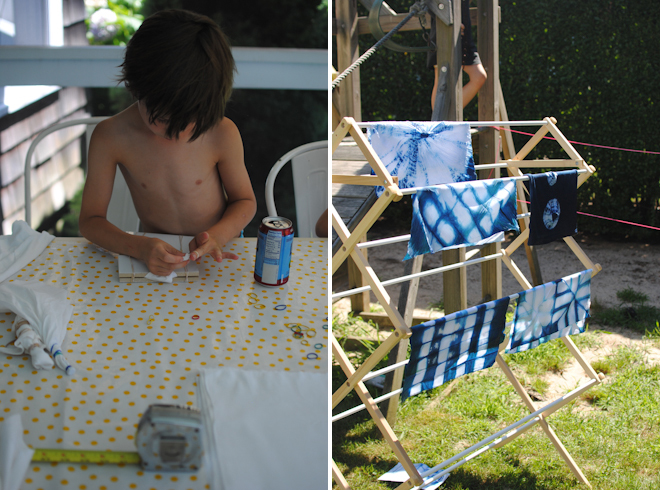


I bought an Indigo Dye Kit from Dharma Trading, which is a great source for supplies for projects like this one. They sell a large selection of garments that are ready to dye, as well as tote bags and quite a few varieties of fabric - you can find them all here. I chose a few pieces of clothing for each child, thinking they would have fun making something they could wear. I also bought a few yards of muslin, and a few yards of canvas. I find that often with this kind of activity the materials run out before the interest does -- the muslin was inexpensive and I knew it would occupy us for a while.
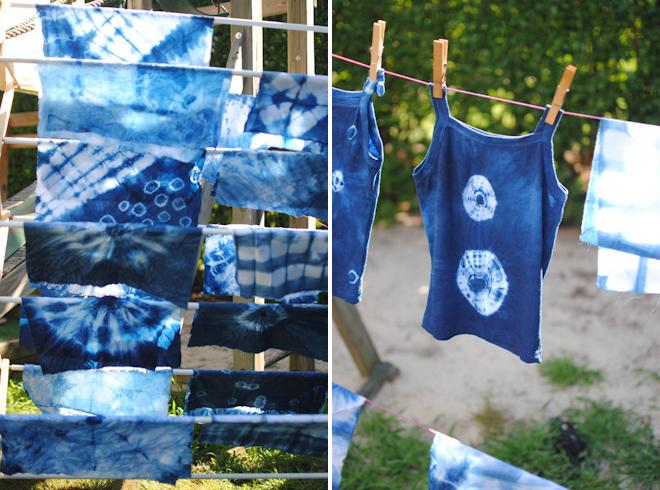


In addition, I bought some other supplies at the hardware store:

*A couple buckets with lids to prepare the dye in -- the dye keeps for days as long as it is not exposed to too much oxygen so the lids are important.

*An assortment of screws and nuts -- these are used if you want to make circular patterns -- look for screws that are a few inches long to make big bold concentric circles, like the ones on the tank top in the photo above.

*Lots of rubberbands...little ones and big ones since the effects are quite different. String is good too.

*Some wooden shims -- these worked well sandwiching the folded fabric, which creates white color blocks or grids. I also had some leftover tiles in the basement which we used the same way.

**You also need enough rubber gloves for everyone...I forgot to do this so we had to divide tasks accordingly!

Last but not least, you need to figure out where you will dry all of your dyed pieces. We borrowed a wooden drying rack from my parents, and strung up a makeshift clothes line on our play structure in the backyard.
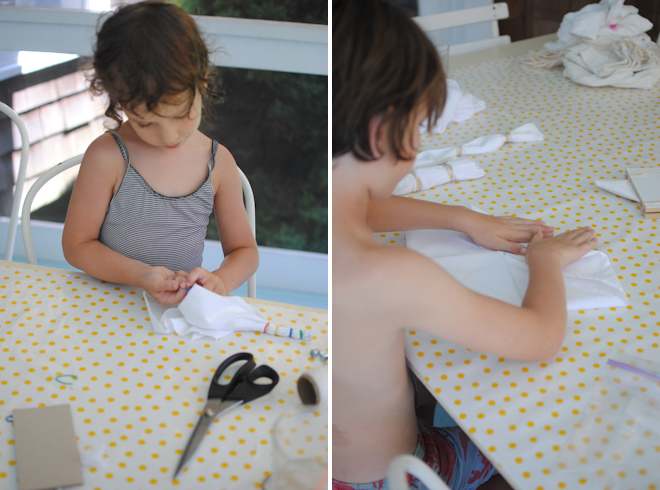
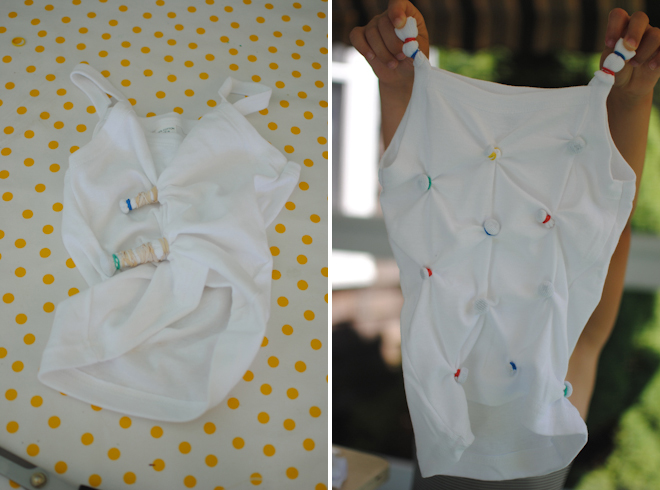


The muslin turned out to be a great idea. I bought 5 yards and cut most of it into 15 inch squares, keeping a few larger pieces as well. That allowed everyone to experiment as much as they wanted to without using up all of our materials. Once we completed a bunch of squares, and could see how things worked out, we were more prepared to dye some clothes. 
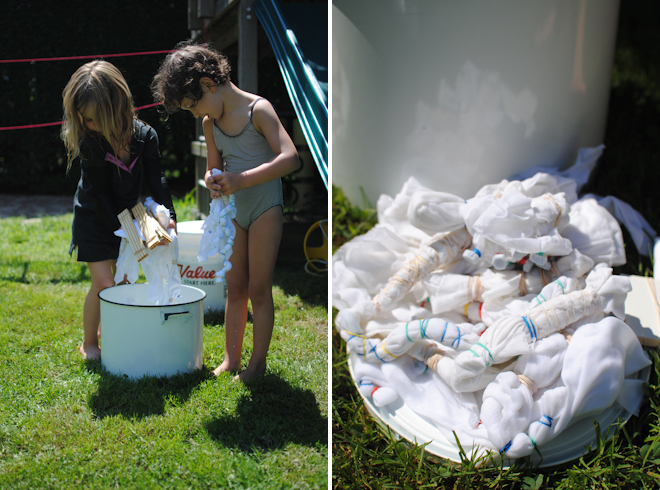


Adam prepared the dye and the rest of us got to work preparing our fabric. We experimented endlessly, so our range of patters was pretty diverse. One of the fascinating things to watch was the dyeing itself. You dip the fabric or garment in water first - I think this helps the dye absorb more evenly. As I mentioned, I neglected to buy was enough rubber gloves for everyone...as a result the kids did the dips into water, and Adam dipped everything into the indigo...Oliver could not be deterred so thankfully I found one more pair of rubber gloves, which he used for a few dips, and then I used to remove all the rubberbands and string and hang everything on our rack and clothes line. When you pull the fabric from the dye bath it first appears bright green and only after it is exposed to the air does it turn blue. It was quite beautiful to watch!
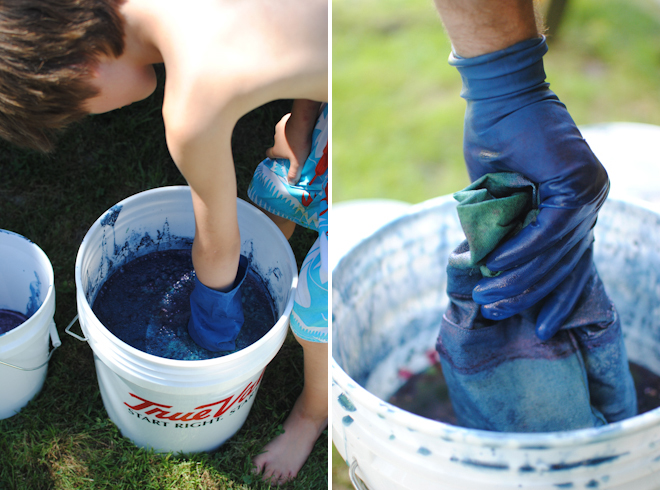


In addition to all the effects you can get with string, rubberbands, and complicated folding, you can also get a beautiful striped effect (known as ombre) by dipping different sections for various amounts of time. I tried this on a canvas tote bag that I bought at Dharma Trading as well.  
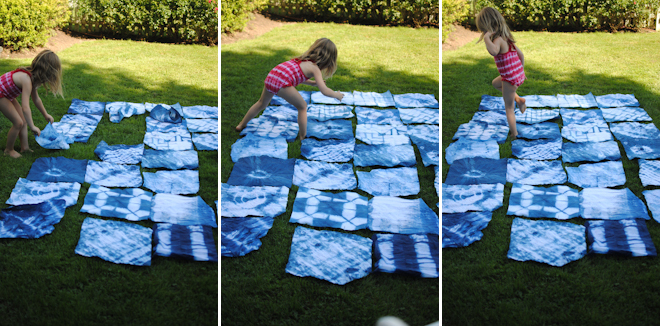


Not only did the muslin serve as a relatively cheap way of extending the experience, but I also now have a new project to work on...I think a quilt, or some quilted pillow cases, will be a great thing to make from all the squares. Bea and I played with the squares making a big grid but I will have to give some thought to other options. I'm not sure I really want it to look like such a patchwork. I found the book SHIBORI very inspiring before starting this project...I will have to take another look for inspiration on how to bring it all together. It will be fun to experiment with the different options for combining all the patterns and shades of blue. 


Until then, we have some happy kids proudly wearing their work!
 

Friday
Aug052011

origami


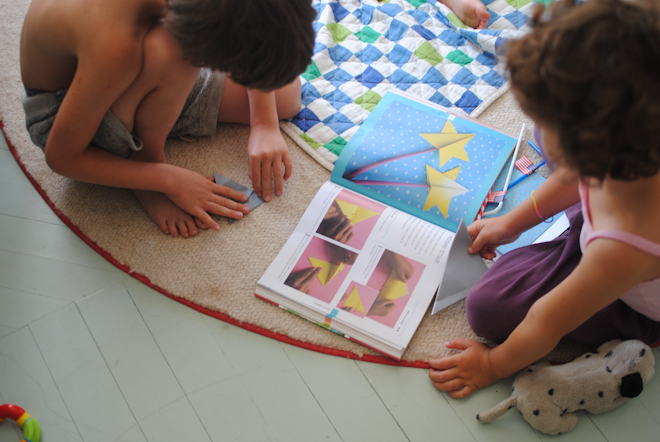
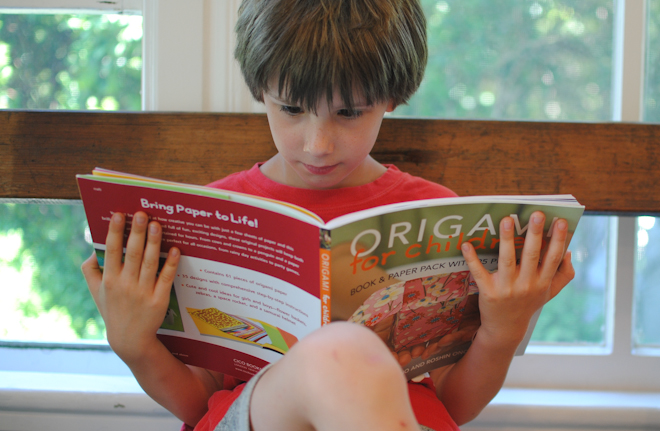
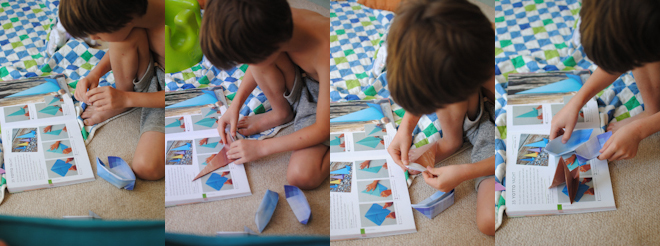
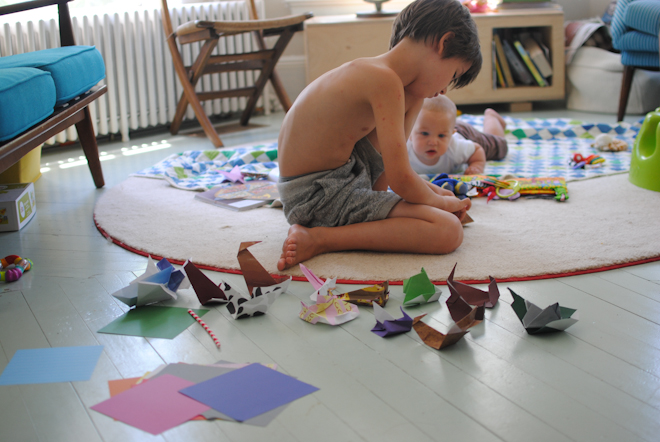
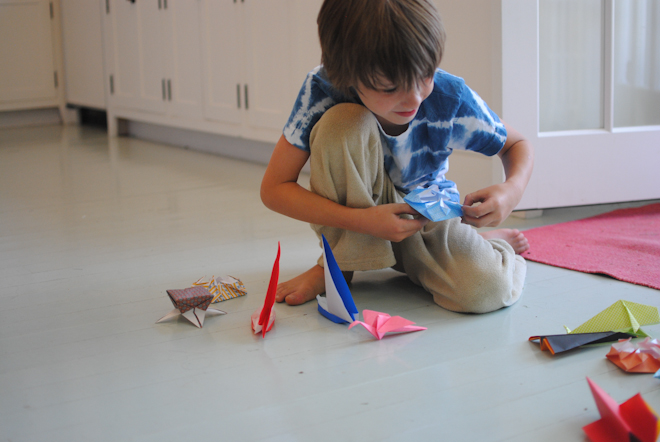
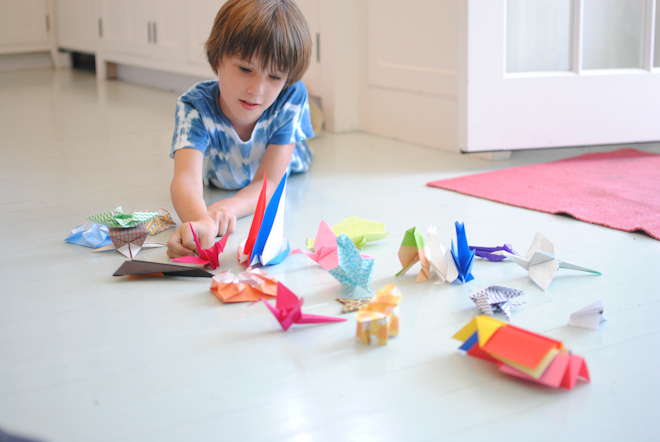
On a recent bookstore visit I found a bunch of Origami books in the craft section, including Origami for Children. My son Oliver loves making paper constructions so I thought he might be interested...that was an understatement! He wanted to start by making a ninja star (no surprise there) so we sat down together to try it out. I assumed that I would do the first one, and then help him make more -- after at least 5 or 10 minutes struggling with the directions I was starting to wonder if the project was doomed. The entire time I was trying to decipher the instructions Oliver was begging to do it himself...I kept putting him off, explaining that it was very tricky! Well, wouldn't you know, when I gave up he quietly got to work and figured the whole thing out. He is a little origami master. After making a bag full of ninja stars he moved through several other ideas in the book, including the balloon, and an armada of ships including some of his own invention. Eventually we were able to make the star wand (shown above) by working together, but we have not been able to replicate it!


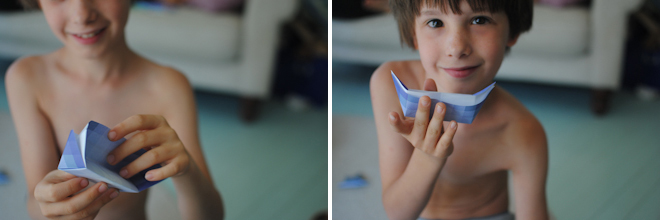
All in all I think the book is good for inspiration, but the how to's are quite confusing. Although my son was not deterred, he is extremely adept at making things, and is fine if the results do not exactly match the photo...as a matter of fact he prefers to make his own interpretations and is not exactly a perfectionist (see bottom photo)! I think the directions could be a lot clearer...the pieces get rotated and flipped without explanation which makes the steps more confusing than they should be. We have not had a chance to try all the ideas in the book but of the ones we did about 70% were successful. I will say, that I was able to make the little box on the cover of the book which is what drew me to the book in the first place...phew!


Wednesday
Aug032011

randall bachner: webs waves & horizons


Somehow I forgot to bring my camera when I went to my dear friend Randall's photography show, Webs Waves & Horizons, at Ion Studio last month. The show was beautiful and I really wanted to share it here. This week I finally managed to get back to see it again, camera in hand! Luckily the show is up through August 24th so if you are in NYC you still have time to see it.


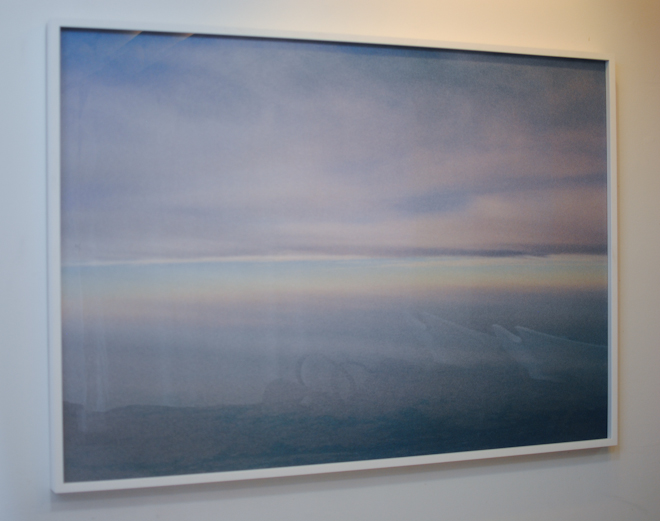
One thing I need to say immediately, is that I learned how hard it is to take photos of photos!! My reflection, as well as the reflections of everything in the room, were obscuring Randall's work to the point that the images I took were useless...you can see all these terrible reflections in the photo shown below. The colors are also much more vibrant and gorgeous in person.


I decided the best way to overcome this obstacle was to get really close and take detail shots of his work (left). My hope is that you will get at least a hint of what he has done, and be inspired to go see the show in person!


Randall took this photo of the horizon at sunrise from the window of an airplane. The colors are so beautiful, and the quality of the image gives it the feeling of a watercolor. I overheard many people at the opening say this was their favorite piece.


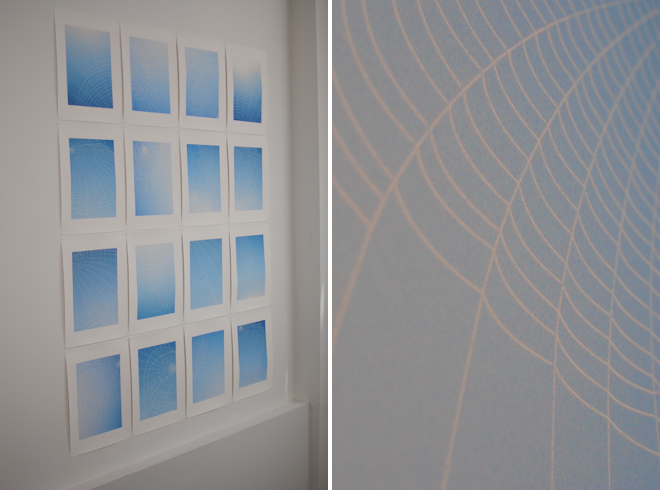
The images in the show are all intense examinations of nature. In contrast to the large scale images Randall also did two series. One was of a single spiderweb, which he photographed over a period of time as it slowly was destroyed by the wind. 


Spiderwebs are such an amazing feat of nature that you cannot help but be drawn in. The detail of the web itself is fascinating but so are the images. Because this particular web was set against a perfectly clear blue sky it is quite surreal. The lines of the web appear to be made of tiny dots, almost as if it had been created by a computer dot matrix rather than a living spider. On my second visit a group of us speculated on what caused this...was it a fine dew that had settled on the web? Or were we seeing a level of detail in the photo that we cannot see in real life?


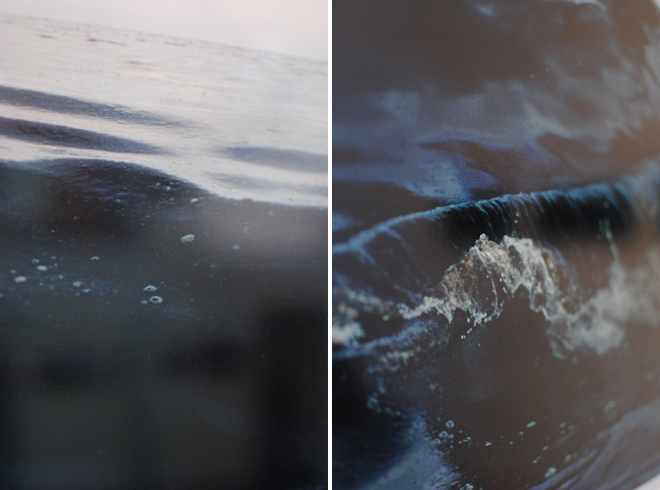
The second series is of ocean waves. They were hung in a corner which added to the feeling of being surrounded by the water. These images capture the details of a "black tide" -- they were taken during a storm in Cape Cod last year. Individually they are beautiful but together they really tell a story, and have a greater impact.


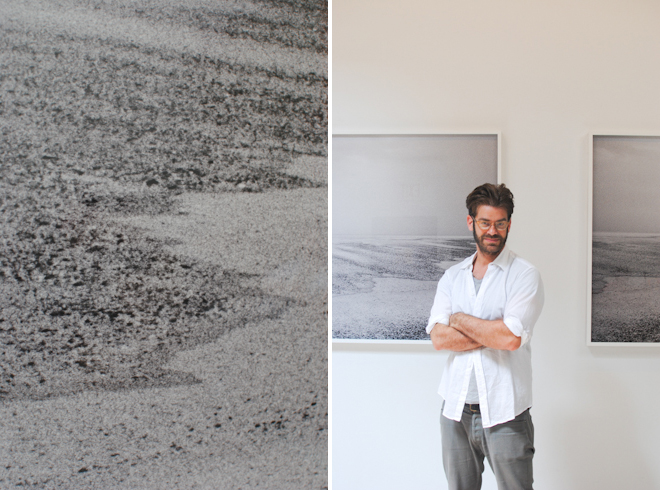
I think my favorite images in the show might be the ones of sand, shown with Randall at the top of this post. They were taken at the beach during a hurricane (maybe not the safest idea) and as you look at them you are unsure where the line is between the grains of sand and the grainy quality of the photograph. The large scale of the prints adds to the effect. As you look at them you wonder where you are, but you can also just appreciate them as abstract art.


The show will be at Ion Studio through August 24th. Ion Studio, 41 Wooster Street, NYC. Tuesday - Saturday 10am-6pm. For more information contact Natia Dune: natiadune@ionstudionyc.com 

To see more of Randall's work you can visit his website: http://randallbachner.com


p.s. To add to the absurdity of me trying to take photos of Randall's photos, here is a picture Randall took of me taking pictures of his pictures!