Tuesday
Sep272011

martha stewart's handmade holiday crafts giveaway


As you have probably noticed, I reference Martha Stewart a lot! I was a senior food editor at Martha Stewart Living and the food editor of Martha Stewart Baby and Kids magazines before my children were born, and I loved every minute of it. I have favorite recipes that I turn to often...the One Bowl Chocolate Cake has appeared at many of our birthday celebrations, but it is the crafts that inspire me again and again. 


When I got a copy of the brand new book, Martha Stewart's Handmade Holiday Crafts, my kids were at my side, pouring over all the ideas. They picked out one project after the next that they wanted to do, and although it was bedtime, insisted on making the "folded shirt card" right then and there...I would not let them raid our large paper stash but even with plain old construction paper they were able to do a pretty good version!


I am sure that many of you would be inspired by this book as well, and am pleased to announce our first ever giveaway: the first five people to respond with a comment will receive a copy. You do not need to give me any personal information here, just send an email to the address below and we will ship the book to any address in the US. I hope you enjoy it, and are inspired to make many of the projects...my kids devoured every page of the Halloween section, and want to make many of the decorations. As always, our biggest struggle will be deciding which ones to try!


Monday
Sep262011

halloween costume: spider

I grew up wearing home made halloween costumes every year, a tradition that I am continuing with my own kids. I love the excitement of planning them together, but the hardest part is agreeing on what the costumes should be...the kids have accepted (with a little difficulty some years) that we do not buy store bought costumes, but that does not mean that they are that conscious of my costume making limitations! Every year we go through all the possibilities and brainstorm about how we would make the various ideas. I am not sure what this year will bring, but thought it might be fun to share some of the costumes we have made in past years, so will be posting lots of idea over the next month.


Although many of these costumes do require some sewing I want to emphasize that I do not do careful finishing details, or very elaboriate constructions. Many of the finished projects have raw edges that fray or look a bit sloppy, sometimes because I could not figure out how to do a better job, other times just because I am out of time. I like the fact that they are home made in a very obvious way, and I hope that as the kids get older that they will love making their own costumes, or working together with me to make them. 


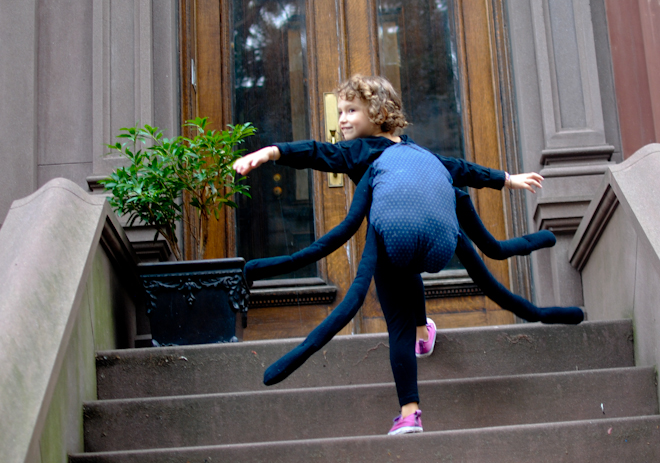
This spider costume was one of the easiest to make, and it was fun to wear too since the spider legs move so well with your child's movements. I first made this spider for Oliver but the photos from that night were not very good, so Lila is modeling it here...the costume has held up pretty well I think - it about three years old and the only thing I have had to repair is the thread that suspends the legs. Coincidentally, Lila had told Lauren that she wanted to be a spider this year so now she is all set. Another benefit of this costume is that the size is very flexible so it can be worn by a variety of ages. It is a good one to keep in the dress up box or to pass on to a sibling, cousin, or friend.


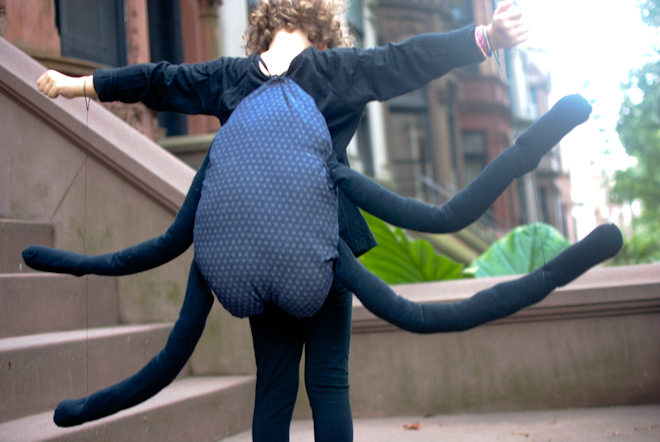
We started with a simple base of a black hooded sweatshirt and pants. The kids own arms and legs count as half of the spiders legs, and then I constructed the rest from black tights. I decided to make the spider body so that it could be worn like a backpack, with legs sticking out on either side. I threaded the legs, leaving several inches of string between them, and attached a hair elastic to the top. The elastic bands can be worn like bracelets so that when your child moves their arms all the legs move with them. Oliver loved climbing our stoop and window guards in this costume, looking like a giant spider scaling a building.


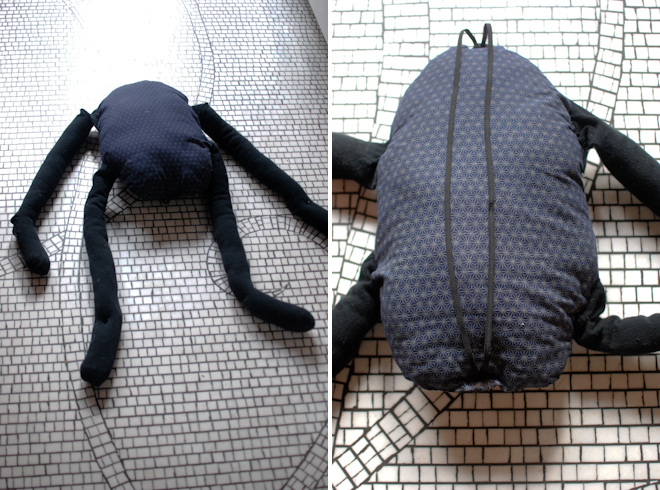
I took two pairs of opaque black tights and stuffed them with stuffing, only filling the legs. There are lots of types of stuffing available at crafts stores - polyester stuffing is available at most, but if you prefer cotton or other natural fibers purl soho has a good selection on their website. I also put a few strips of craft foam in the legs to keep them a bit less floppy but I do not think this step is totally necessary.


To make the body I cut two ovals of a dark patterned fabric. Pin the legs between the two layers of fabric (wrong sides together) so that the crotch end of the tights is on the outside, and the legs are sandwiched between the fabric ovals. Sew this area on the sewing machine to secure. Repeat this step on the other side, being careful to arrange the legs so that they will all be sticking out sideways from the oval when you turn it right side out...you will need to pin them in place and then bend the legs down through the bottom of the oval. When you sew the second pair of legs continue around the oval to the other side, just leaving the opening where the legs are sticking out open.


Turn the oval inside out so that the right sides are out, and the legs are on the outside. Stuff the body of the spider with more filling and sew the opening closed, either by hand, or by machine, whichever you find easier. To make the straps I used long piece of black elastic. I folded it in half and sewed the folded end to the top of the spider body, sewing over it several times to secure it. Sew the ends to the bottom of the body in the same way.


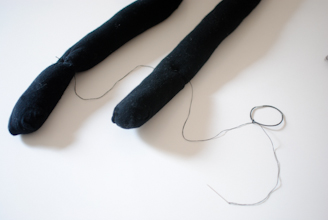
Thread a needle with a double thickness of black thread (or for an even more durable solution a length of clear fishing line) and knot it at the bottom. The thread needs to be long enough to have the spider legs hang separately at the sides of the body. In order to make the legs stay suspended and move with your child, sew through the heel of the bottom leg, going from top to bottom a few times - this secures the thread, and it also flattens the heel creating a little bend in the leg so it looks more like a spider leg and less like the foot of your tights. Now continue through the top leg, leaving about 6-8 inches of thread between the two, repeating the stitching through the heel for this leg too. You should still have at least 12 inches of thread left on the needle. Secure this to a hair elastic by knotting it repeatedly. Repeat this whole process on the remaining legs on the other side of the spider. 
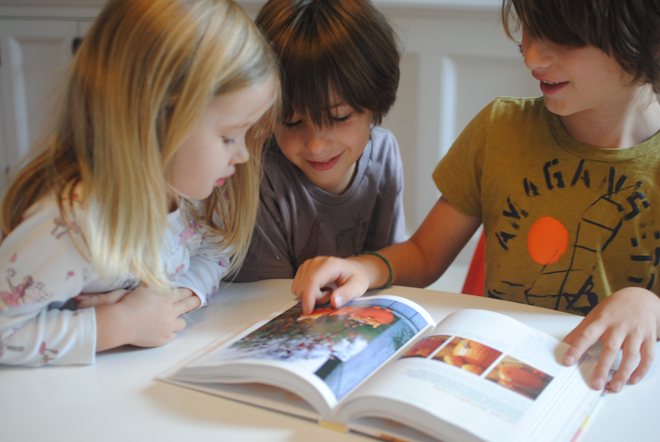
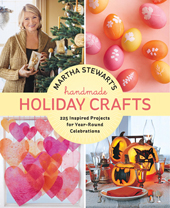


Friday
Sep232011

owl applique


I accrued quite a large stash of fabric when Lauren and I had our business, mr.tiny. Between leftovers after manufacturing, samples that never made it into the line, and remnants that I found here and there, the piles grew and grew. My ideas of what to do with all this fabric are always changing...one year I decided to make a quilt for my grandmother (who taught me a lot about sewing and knitting), another year I made pillow cases and gave them to everyone for Christmas. At another point I started hunting for easy children's clothing patterns, thinking maybe one day I'd be able to make our samples. In addition to the random things I make each year, the most frequent reason to head for the sewing machine is to make a baby shower gift or 1st birthday present.


This owl applique was one of the projects that came from that stash. It was very fun and quite simple to make...it also allowed me to use some of the more patterned and textured fabrics that I am always drawn to but never quite know what to do with. First I looked through images of owls so that I could come up with a simple sketch. Then I looked through the remnants of fabric, looking for anything vaguely feathery. I decided frayed edges would add to the effect, simplifying the idea even further.


Lauren loved the finished piece so I gave it to her to hang in Lila's room. When Noah was born she decided maybe it would move to his room...an animal theme has evolved there, inspired in no small part by Noah's Ark. After having it hanging on a magnetized bar in Lila's room for years, we felt it was time to frame it so it could be hung on the wall. It seemed that framing it behind glass would detract from the homemade feel of it so I decided to sew it to a stretched canvas. I found this link to learn how to stretch canvas over a frame. Because of the small size of the piece it was easy to do--it only took about 10 minutes. 


Once the canvas was stretched I had to figure out how to attach the applique to it. In keeping with the rustic look I opted to use a very simple and visible x stitch. I must admit, I am pleased with the end result. 

Wednesday
Sep212011

flat chicken

As I lamented on Monday, I am often deterred from making roasted chicken (a dish we all love) because it takes just a little too long. I have seen many recipes that call for flattening the bird but never got around to trying any of them. I finally decided to give it a go and I must admit it is sort of a miraculous way to make a whole roasted chicken. You just need a really sharp pair of kitchen scissors to remove the back bone. In addition to cutting the cooking time down dramatically it also evens out the browning so you get a beautiful evenly browned crisp skin. If you want to see how to cut the backbone out of the chicken, momfilter just posted Gwyneth Paltrow's chicken recipe - she does a demo on her blog GOOP.

Monday
Sep192011

roasted chicken and vegetables


There is something very satisfying for me about making an entire meal in one pan. My family loves roasted chicken but I find that I am often behind schedule when it comes to starting dinner, and as a result roasting a whole chicken is just a little too time consuming. We all loves drumsticks and thighs so just buying the legs is a great solution to the problem. I add potatoes (cut in halves or quarters), an onion cut into wedges, a handful of peeled garlic cloves, 2 lemons (cut into quarters or sixths), and some thyme sprigs. I add any veggies I have on hand - in the fall an acorn squash, other times baby carrots, etc. I finally realized that broccoli is good in the roasting pan too...and somehow eliminating that final step of making a green vegetable, was very satisfying!


Combine all the ingredients in a large bowl and drizzle with a few tablespoons of olive oil, a drizzle of balsamic vinegar, and some coarse salt and freshly ground pepper. Toss it until everything is well coated and transfer to a roasting pan. Cook in a 450° oven for about 40 minutes, turning potatoes and other vegetables over about halfway through.  


Friday
Sep162011

map totes by sammy


Over the summer we spent a few days on Fire Island with friends Jodi and Fred, and their boys Sammy and Lionel. The absence of cars on the island means much more freedom and independence for kids, and one way this was most apparent were all the entrepreneurial kids. Every time we left the house we passed kids selling lemonade, painted shells, home made cookies, etc. Once a summer the island fully embraces this trend and has a big sale where all the kids get to set up a stand...in true Fire Island spirit they each bring a red wagon displaying their wares. Sammy and Lionel have had a wagon for the last couple years where they sell tote bags that Sammy makes. The bags are so cute that they sold out in past years so Sam was in full production mode when we arrived a few days before the sale. It is so great to see how he has channeled his longtime interest in maps into a great product...be in touch if you want a custom tote and I will make the introduction!


Thursday
Sep152011

rainbow risotto


We went to the farmer's market on Sunday and I picked up some corn on the cob thinking that I would make corn risotto, one of my favorite comfort foods. As I started cooking I was looking through my vegetable drawer and a bunch of rainbow chard caught my eye. At first I was thinking of it as a side, but then I decided to try incorporating it into the risotto. It was so pretty as it cooked, and the risotto was delicious. The best part was that it would have taken a lot of serious negotiating to get my kids to eat the chard on its own but in the risotto they ate it up. I use bacon in this recipe for added flavor but you can skip it and just substitute a couple tablespoons of olive oil for the bacon fat if you prefer. You will also need to salt the risotto a little more generously if you omit the bacon. Normally when I start a dish with bacon I cook the whole recipe in the same pan, but since the bacon browns quite a bit and I did not want a risotto with lots of flecks in it I started with a fresh pan for the risotto.


Risotto has a reputation of being difficult because of the constant stirring. I have found that even if you walk away from the pot a few times, as long as you stir it regularly and add the stock slowly, it is still delicous. Also, for perfect risotto you need to start with a separate pot of hot broth to cook the rice with. When making this for a family dinner I just use store bought broth and pour it straight from the box and it is fine. My feeling is that these small compromises are worth it if they allow you to make something you might not otherwise!


RAINBOW RISOTTO

1 package thickly sliced bacon, cut into 1/4 inch strips (you can choose between a pound and a half pound package based on how much of a bacon lover you are)

1 bunch rainbow chard

1 onion, peeled and finely chopped

1 red pepper, seeds and core removed, finely diced

1 pound arborio rice

1/2 cup white wine

5-6 cups chicken broth (can substitute vegetable broth)

6 ears fresh corn, kernals cut from the cob

1 tablespoon butter

1 cup freshly grated parmesan cheese, plus more to taste

Sea salt and freshly ground pepper, to taste


Saute bacon in a heavy skillet until crisp. Remove with a slotted spoon and transfer to a paper towel lined plate. Set aside. Reserve bacon fat.


Wash chard and remove stems from leaves by cutting the leaves away from the center rib. Finely dice stems as you would celery and set aside. Coarsely chop leaves and set aside in a separate bowl.


Add one or two tablespoons of reserved bacon fat to a large pot and heat over medium hight heat. Add onion and cook, stirring occasionally until translucent. Add red pepper and chard stems and cook, stirring occasionally, for a couple minutes until soft. Add rice and cook stirring for about 2 minutes. Add wine and cook, stirring, until all liquid has evaporated. Start adding the broth slowly - a cup or 2 at a time - and still regularly until broth is evaporated. Repeat this, adding the corn about halfway through, until the rice is just tender but not soft. Stir in the butter and parmesan, and season with salt and pepper. Stir in bacon, or serve it on the side and let people add it themselves.


Risotto should pool slightly. If your risotto is not a little runny after you add the cheese add a little more broth or water to loosen it up.

Wednesday
Sep142011

green salad with fresh figs


If you have not developed a love for figs this is the time of year to try. When ripe they are juicy and sweet, but it is their unique texture that makes them extra special.  This salad is simple enough for everyday but so pretty that it would also be great for a dinner party. I used butter lettuce from the farmer's market as the base. Add figs (cut into halves or quarters), grapefruit sections, and some chopped pistachios. For the dressing I drizzled the salad with extra virgin olive oil, a squeeze of grapefruit juice, balsamic glaze, and a little fleur de sel.


To see if figs are ripe press very gently - they should be soft but not be mushy. You will find several varieties at this time of year as well...the most familiar are black mission figs, but the rounder green calimyrna figs are also very delicious. There are several classic ways to eat them as well: paired with prosciutto, or on a crostini with mascarpone and a drizzle of honey, are among my favorites. I also love to eat them alone, or mixed into fruit salads for a little unexpected crunch.

Tuesday
Sep132011

sectioning citrus

Citrus fruits are a lively addition to all kinds of recipes...I particularly love sectioning grapefruit or oranges and adding them to salads. Tomorrow I plan to post a fig salad recipe that includes grapefruit sections so thought maybe a quick how to might be helpful.


Slice the top and bottom off the fruit so it sits level on a cutting board. Then, carefully follow the shape of the fruit with a sharp knife, removing the peel, pith, and outer membranes. Holding the peeled fruit in your hand, carefully cut the citrus sections out of the inner membranes. Once the sections are all removed you can squeeze the juice from the membranes before discarding them.  The juice can be used in dressings, making them even more flavorful. 

Monday
Sep122011

charity: donors choose

With all the excitement of "back to school" it seems like a good time to mention one of my favorite charities. Donors Choose is a website where teachers can post projects they would like to do in their classrooms but cannot afford with their budget restrictions. As a parent of public school children I know first hand how many enriching activities arise that call for additional funds - whether it is a couple dollars for a class trip, or larger contributions to the PTA to fund an art teacher. I love that through Donors Choose you can look for activities that strike a chord, or sort by schools that are in high poverty districts...it is a great way to help school children, and show support for the teachers out there that want to make a difference.